
When you think of dependable garage doors, LiftMaster is a brand you can trust for quality and new ideas. Still, even the best systems might need a reset now and then. This guide will help you.
With years of experience in garage door services, we will show you how to reset LiftMaster garage door opener step by step. If your remote isn’t working or you just want to refresh your system, follow these steps to take back control and enjoy smooth garage door use.
Key Takeaways
- How to reset LiftMaster garage door opener can resolve many common issues, such as remote control malfunctions and connectivity problems.
- Identifying your LiftMaster model and understanding its features is crucial for a smooth reset process.
- Always prioritize safety by disconnecting the power supply and using appropriate tools during the reset procedure.
- Familiarize yourself with the location of the reset button and the correct method for executing the reset, which varies slightly between models.
- Regular maintenance and timely troubleshooting can extend the lifespan of your LiftMaster garage door opener and ensure optimal performance.
Understanding How to Reset LiftMaster Garage Door Opener
A garage door opener reset is often the easiest fix for many problems. It can help with issues like a garage door that does not respond to remote commands, a keypad that won’t work, or even a garage door that opens and closes unpredictably.
Think of it as giving your LiftMaster garage door opener a fresh start. When you reset your LiftMaster garage door opener it, you clear out any errors or glitches that may be messing with how it works.
1. Identifying Your Model and Features
Before you start any reset, you need to find out how to reset LiftMaster garage door opener model. This is important because the reset process can change slightly based on the model and its features.
You can usually find the model number on a sticker on the back or side of the motor unit. You can also check your LiftMaster user manual. It often has detailed information about your type of opener.
After you find the model number, write it down. This will help if you need to look at the user manual for instructions or if you need to contact LiftMaster customer support. Knowing your model number helps you follow the right reset steps to avoid any problems.
2. Importance of Regular Resets and Maintenance
How to Reset LiftMaster garage door opener can help fix short-term problems. However, regular maintenance is important to keep it working well and lasting longer. Like any machine, your garage door opener needs care to avoid bigger issues later.
Simple maintenance tasks can really boost the performance of your garage door opener. These tasks include lubricating moving parts, checking the sensors for alignment, and looking at the battery life of your remote controls. By taking care of small problems quickly, you can prevent them from becoming major ones. This way, you can enjoy a safe and reliable garage door for many years.
Keep in mind, a garage door opener that is well-maintained helps make your home safer and more convenient.
Preparing for the Reset Process

Before you start the reset process, it helps to take a few simple steps first. Gather the tools you need and make sure your workspace is safe.
Having everything on hand will keep you from getting interrupted and frustrated. It’s also important to prioritize safety. Disconnect the power supply and take steps to stop any accidents. This way, you can have a smooth reset experience.
3. Gathering Necessary Tools and Equipment
When you want how reset your LiftMaster garage door opener, having the right tools makes it easier. Good news! You don’t need anything fancy. Usually, all you need is a stepladder, a pen, and paper.
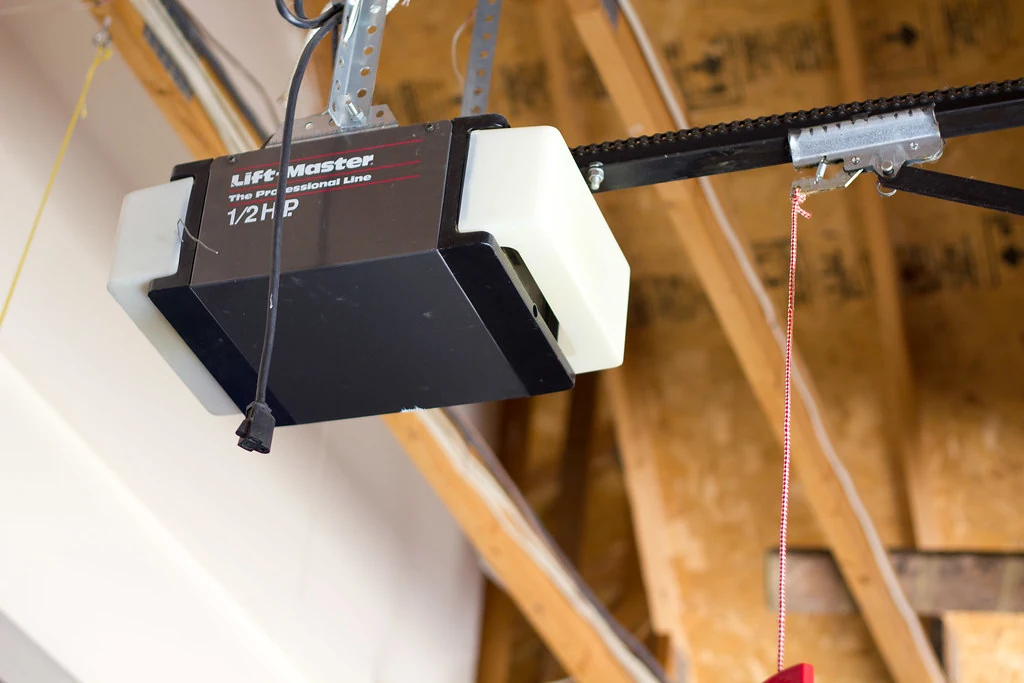
A stepladder helps you reach the motor unit. This unit is often on the ceiling of your garage. With the stepladder, you can access the reset button and any other parts you need for the reset process.
Using a pen and paper is a smart idea too. You can write down your model number or key information from the user manual. While it may seem unimportant, having these things close by can prevent you from searching for them later. Using trusted products and these simple tools will help make your reset quicker and easier.
4. Ensuring Safety Before Starting
How to Reset LiftMaster garage door opener is usually safe. However, it’s very important to create a secure environment. This helps to avoid any electrical accidents. The very first step is to disconnect the power supply to the garage door opener. You can do this by either unplugging it or turning off the circuit breaker that controls the garage.
This step takes away the risk of electrical shocks and stops the garage door from moving unexpectedly during the reset process. It gives you peace of mind. After you have disconnected the power, it’s a good idea to wait a few minutes before continuing.
By following these safety steps, you reduce the chances of accidents. This way, you create a safe place for using the reset process on your LiftMaster garage door opener.
Beginner’s Guide to Resetting Your LiftMaster Opener
Now that you are ready, let’s go to the reset process. The steps are easy to follow, even for people who are not good with technology.
Make sure to follow each step carefully. It helps to check your user manual for instructions that fit your model. If you know the layout of the control panel and what each button does, you can go through the reset process easily.
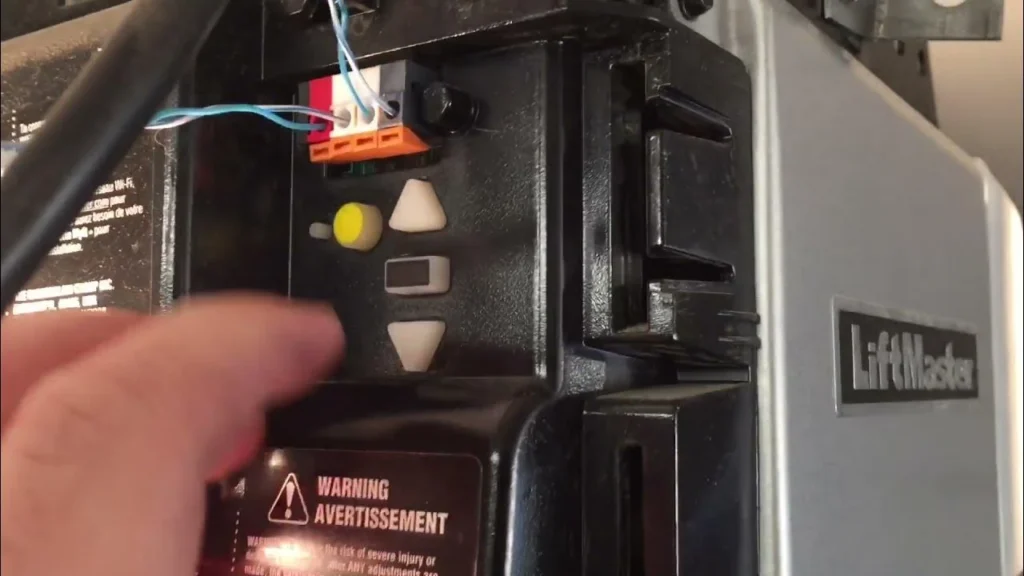
5. Step 1: Locating the Reset Button
The first step to How to reset LiftMaster garage door opener is to find the reset button. This button is small and might be hidden, so it can be hard to spot for new users.
The location can change based on the model of your LiftMaster opener. Often, the reset button is on the control panel, either on the side or back of the motor unit.
If you can’t find it, look in your user manual or visit the LiftMaster website for guides that fit your model. The reset button typically has the word “Reset” on it or has a unique color, which makes it stand out from the other buttons.
6. Step 2: Executing the Reset Procedure
After you find the reset button, your next step is to start the reset. Usually, this means pressing and holding the button for a set amount of time. The time you need to hold the button can change based on your model.
Check your user manual for the exact steps. When you press the reset button, you might see an indicator light on the motor unit blinking or changing color. This usually means that the opener is in programming mode and the reset is happening.
Keep holding the button as needed until the light turns off or stops blinking. When the light goes back to normal, it means the reset is done. The opener will remove all old programming and return to its original settings.
7. Step 3: Testing the Opener Post-Reset
With the reset done, it’s important to check the opener and make sure everything works well. Use your remote control, keypad, or wall panel to open and close the garage door. Watch closely to see how smoothly it moves. There should be no strange noises or delays during its operation.
Testing this way shows that the reset worked and the opener responds correctly. If the door opens and closes smoothly, great job! your LiftMaster garage door opener reset successfully.
But, if you still have problems or see anything strange after the reset, it may mean there is a trickier issue. In that case, don’t wait. Contact a certified garage door technician to investigate and fix the problem.
Troubleshooting Common Reset Challenges
Resetting your LiftMaster garage door opener is usually an easy task. However, you may face some problems. These issues can include problems syncing your remote control or times when the reset doesn’t work as expected.
Don’t worry, though. Most of these problems can be fixed with some quick troubleshooting tips. By figuring out what caused the issue, you can often solve it on your own without having to call in a professional.
8. Addressing Remote Control Sync Issues
One common problem how to set reset LiftMaster garage door opener is trouble syncing the remote control. This happens when the opener’s memory gets completely wiped during the reset. You will need to reprogram your remote.
Most LiftMaster openers have a “Learn” button for this programming. You can find this button on the motor unit. Check your user manual for steps that match your specific model.
After you program your remote control, test it out. Make sure there is a strong connection between the remote and the opener.
9. What to Do If the Reset Doesn’t Work
If you have carefully done the reset process but your LiftMaster garage door opener is still not working right, it might be time to try more troubleshooting steps. First, make sure the power supply to the opener is on. Also, check that you held the reset button for the right amount of time.
Often, a small mistake can be the issue. If you have tried all the basic troubleshooting steps and nothing worked, it may be best to get help from a pro.
Contact a skilled garage door technician. They have the right knowledge and tools to find the problem. Trying to fix complex issues without the right skills can cause more damage or even be unsafe.
Conclusion
Regular upkeep and knowing how to reset LiftMaster garage door opener are very important for it to work well. By doing the steps in this guide, you can help your opener run smoothly and efficiently. Always remember to prioritize safety when you reset it. If you face any common issues, take the time to troubleshoot them.
Caring for your garage door opener will help it last longer and give you both convenience and peace of mind. If you have problems, feel free to look back at this guide or get help from a pro. A well-maintained LiftMaster opener will keep serving you reliably for many years.
Frequently Asked Questions
1. How do I know if my LiftMaster opener has successfully reset?
A successful reset usually shows a flashing indicator light on the motor unit or a change in its pattern. The best way to check if the reset worked is to test the opener’s functionality. See if your garage door opener reacts to commands from the remote or wall panel to be sure.
2. Can I reset my LiftMaster opener without a ladder?
Resetting your LiftMaster opener means you need to reach the motor unit, which is usually high up. To stay safe, always use a sturdy ladder. Trying to do this without a ladder can cause accidents.
3. How do you reset a LiftMaster garage door opener?
Find the “Learn” or “Reset” button on the motor unit of your LiftMaster garage door opener. Press and hold this button. Follow the instructions in your manual. Keep holding until the indicator light starts to blink or changes.
4. How do I manually reset my garage door opener?
A manual reset means you should turn off the power to the opener. You can usually do this at the circuit breaker. After that, you need to find the reset button on the motor unit. Be sure to check your user manual for steps that are specific to your model.
5. How do I reprogram a LiftMaster garage door opener?
Reprogramming means getting rid of old codes and adding new ones. Usually, you press the “Learn” button on the motor unit. After that, you press a button on your remote control to set a new code.
6. How do I reset a LiftMaster side mount?
Resetting a LiftMaster side mount is much like resetting other models. First, find the “Learn” or “Reset” button on the motor unit. Then, follow the steps given in your manual for specific instructions.
7. How to reprogram a LiftMaster garage door opener?
Reprogramming means setting the opener to programming mode. You can usually do this by pressing the “Learn” button. After that, press the button on your remote control that you want to use. This will save the new settings.
8. Will unplugging a garage door opener reset it?
Unplugging can cause a short power reset, but it won’t clear everything. To reset all settings, you need to find the “Learn” or “Reset” button on the motor unit.
9. How do you reset the limit on a garage door opener?
Resetting the limit settings helps control how far the door opens and closes. You need to follow a step-by-step process for this adjustment. It’s important to consult your manual for specific instructions. This will help you have precise control over the door’s movement.