You know that moment when you walk into your garage, glance at the floor, and just… sigh? The stains, the cracks, maybe even some old peeling epoxy from a half-finished DIY project — it’s not exactly inspiring. And yet, your garage takes a beating every day. Cars roll in with hot tires. Oil drips happen. Tools drop. Life happens.
In 2025, more homeowners are looking for flooring that doesn’t just cover up the problem — but actually solves it. Enter the rising star of garage makeovers: polyaspartic garage floor coating.
At first, it might sound like another industrial product with a fancy name. But this stuff? It’s genuinely changing the game. It goes on faster, holds up longer, and handles sunlight, chemical spills, and winter slush without flinching. Whether you use your garage as a workspace, gym, man cave, or a plain ol’ place to park, polyaspartic coatings offer a real upgrade — not just a cosmetic one.
In this guide, we’ll dive into what makes polyaspartic flooring different, why it’s quickly becoming the best garage floor coating in 2025, how it compares to epoxy, and whether it’s the right choice for your space, your budget, and your peace of mind.
What Is Polyaspartic Garage Floor Coating?
Tired of staring at cracked, stained concrete every time you walk into the garage? You’re not alone — and in 2025, more people are switching to polyaspartic garage floor coating for a cleaner, tougher solution. It dries fast, lasts long, and actually makes your garage feel finished.
1. The Rise of Polyaspartic Garage Floor Coating
You ever open your garage and just… sigh? Like the floor’s been through a war zone — oil stains, random cracks, that dull gray that somehow always looks dirty. It’s kind of amazing how quickly a garage floor turns into something you want to ignore.
I used to think mine was just ugly, but harmless. Then I tried to clean it with a mop. It basically laughed at me.
And this is where polyaspartic garage floor coating sort of enters the chat. You’ve maybe heard of it — maybe not. But in 2025, it’s showing up everywhere, and honestly, there’s a reason for that.
More homeowners, especially DIY folks and auto shop owners, are switching to polyaspartic coatings because they’re realizing two things: epoxy garage floors don’t last as long as we thought, and concrete floors take more abuse than we admit. You park hot tires on them, spill who-knows-what during weekend projects, and then expect them to magically stay clean and crack-free for a decade.
Spoiler: they don’t.
Polyaspartic floor coating changes that expectation. Fast cure times, impressive UV resistance, chemical resistance, and surprisingly customizable designs (yeah, you can actually get decorative flakes that look really sharp) — these are just the surface-level perks.
2. Understanding the Basics of Polyaspartic Coatings
Alright — so let’s break this down in plain English. Polyaspartic garage floor coating sounds a little sci-fi, but it’s actually a practical upgrade for anyone tired of dusty, dull, cracked-up concrete floors. Think of it as a next-gen version of epoxy garage floors, just… more evolved.
So what exactly is it?
A Quick Chemistry Lesson: What Is Polyaspartic?
Technically speaking, polyaspartic resins belong to a class of polyurea coatings — but not all polyurea is polyaspartic. Confusing, I know. The difference is in how they cure and how they hold up under real-life conditions.
Polyaspartics are what scientists call an aliphatic polyaspartic coating, which means they’re more UV stable, more abrasion-resistant, and — this is key — they don’t yellow under sunlight. Epoxy, for all its early promise, kind of falls short here. It looks great for a while, then fades, chalks, or turns weirdly amber after a few summers. Especially if your garage gets a lot of light? Yeah. Not ideal.
So what does a polyaspartic do that epoxy doesn’t?
Here’s a quick side-by-side glance:
| Feature | Epoxy Coating | Polyaspartic Coating |
|---|---|---|
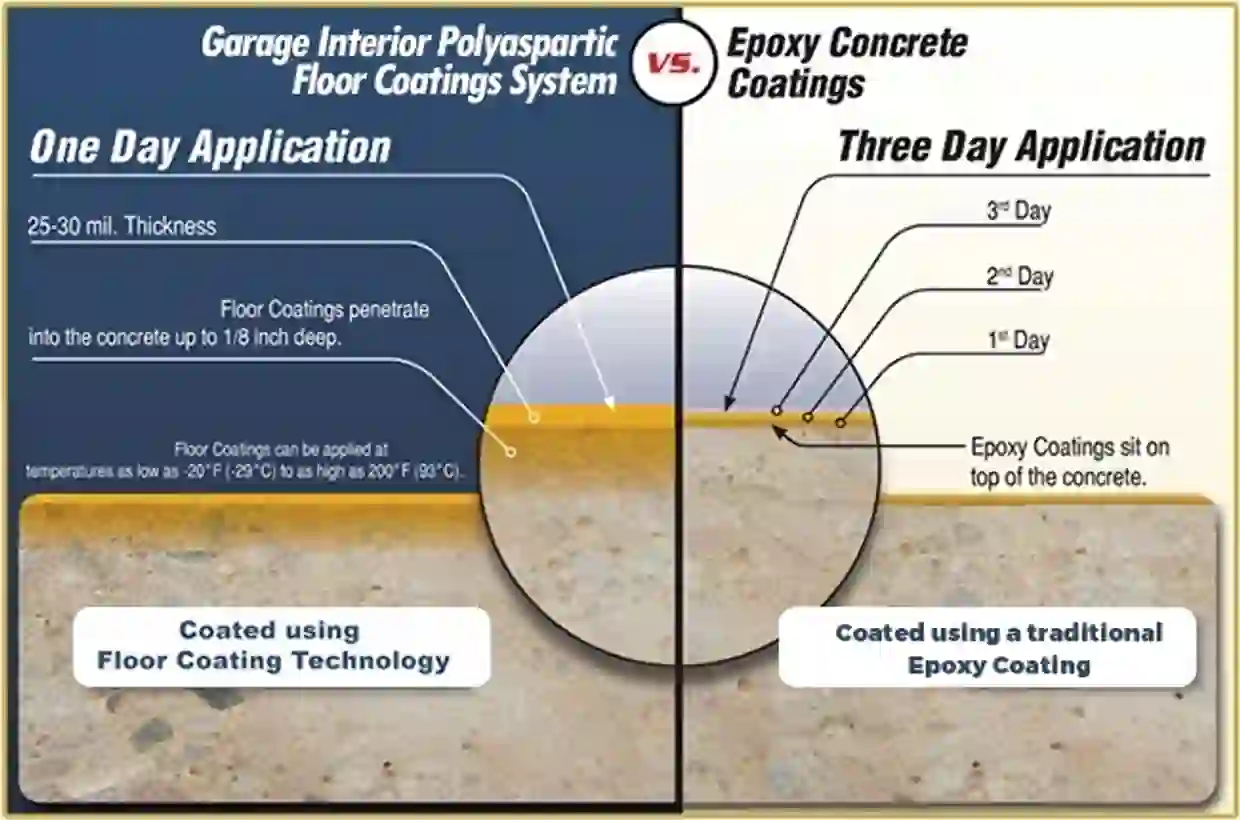
| Cure Time | 24–72 hours | 1–3 hours |
| UV Stability | Poor to Moderate | Excellent |
| Abrasion Resistance | Good | Exceptional |
| VOC Emissions (Health Risks) | High (some variants) | Low (more eco-safe) |
| Decorative Flakes/Finish | Limited Options | Wide Range |
| Self Priming (Ease of Use) | No | Yes (in many cases) |
So yeah — polyaspartic coatings aren’t just faster, they’re built for UV rays, vehicle traffic, chemical spills, and even stuff like hydrostatic water pressure (if you’ve ever had water sneak up through your floor, you know the pain).
And maybe this matters to you, maybe not — but they’re often low VOC, which means less indoor air pollution, fewer health risks, and a safer cure process if you’ve got pets or kids around.
How It Differs from Traditional Epoxy and Polyurethane Coatings
If you’ve looked into garage flooring before, you’ve probably seen the battle: epoxy vs polyaspartic. It’s not even that epoxy is bad — it’s just that polyaspartic garage floor coating fixes most of epoxy’s weaknesses:
- Epoxy takes forever to dry. Like, days. Polyaspartic? A few hours, maybe less.
- Epoxy can bubble or peel if moisture seeps in. Polyaspartic holds tight — better adhesion, better chemical resistance.
- Epoxy yellows in sunlight. Polyaspartic stays crisp and clear.
Some people still swear by epoxy garage floors, and sure, they’re usually cheaper upfront. But in 2025? Most pros — and even companies like Garage door Living and Resudeck Systems — are recommending polyaspartic as the new go-to for resin-based flooring systems.
Pro Tip: If you’re installing in a space that gets direct sunlight or changes temperature quickly (hello, outdoor use), always check for “UV stable” or “UV resistant” on the product’s Safety Data Sheet. That detail matters.
3. 2025 Benefits of Polyaspartic Garage Floor Coating
So now that you kind of know what polyaspartic garage floor coating is — what makes it so good? Like, really. Is it just hype or is there something more going on here in 2025?
Honestly? It lives up to the reputation. And the difference isn’t subtle once you see it in action — whether it’s a fresh install in your neighbor’s garage or a renovation in an auto shop that sees daily abuse from tires, spills, and tools.
Let’s walk through the biggest reasons people are ditching old-school epoxy garage floors and upgrading to polyaspartic flooring.
Fast Cure Time — Use Your Garage in a Day
You know that feeling when you’re finally motivated to upgrade something… and then the project takes forever? Yeah. Polyaspartic coatings solve that.
Most polyaspartic floor coatings are fully cured and ready for vehicle traffic within 24 hours — sometimes even sooner. You don’t need to vacate your space for days or wait around checking if it’s dry.
Compare that to epoxy, where cure times can drag on for 3 to 5 days (especially in cold or humid weather), and it’s kind of a no-brainer.
Pro Tip: Look for CFS-1C POLYASPARTIC SINGLE COMPONENT COATING options if you’re doing a quick project — they simplify the application method and speed up dry time.
High UV Stability — No Fading or Yellowing
Here’s the thing: garages get light. Sometimes a lot of it. Whether you keep the door open or have windows that catch the afternoon sun, UV exposure is real — and it can wreck your floor.
Polyaspartic resins are UV stable, which means they won’t yellow, fade, or chalk over time. Epoxy? Not so lucky. Even with a good top coat, it can’t compete in terms of UV resistance.
Aliphatic polyaspartic coating formulas are specifically designed to hold up under UV rays, making them perfect for outdoor use too — patios, driveways, you name it.
Extreme Durability — Resistant to Chemicals and Scratches
This is where polyaspartic coatings really flex.
- Abrasion resistance? Check.
- Chemical resistance? Yep — even against things like oil, antifreeze, and mild acids.
- Water resistance? Totally — even under hydrostatic pressure.
You can drag equipment, spill stuff, park your car every day… and the surface still holds strong. That’s why polyaspartec floor systems are a favorite in shop floors and industrial spaces, not just homes.
Oh, and they’re great against salt in winter too. Which is a bonus if you’re somewhere snowy
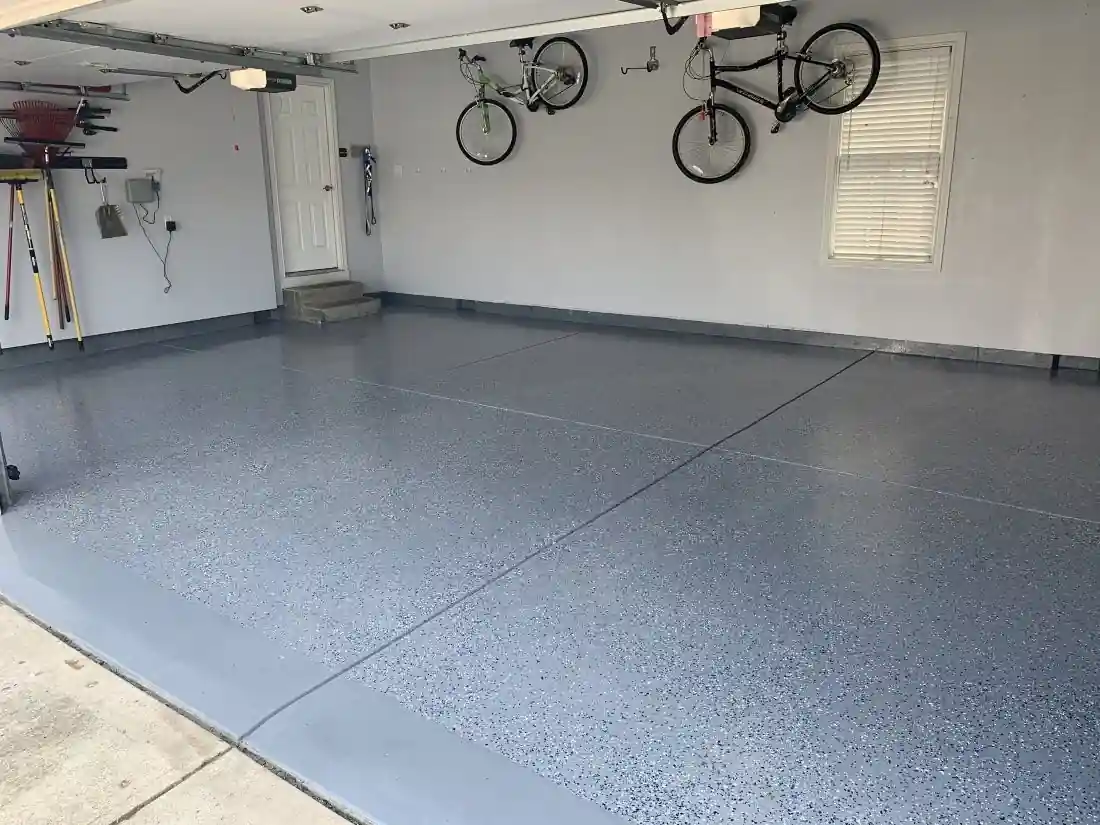
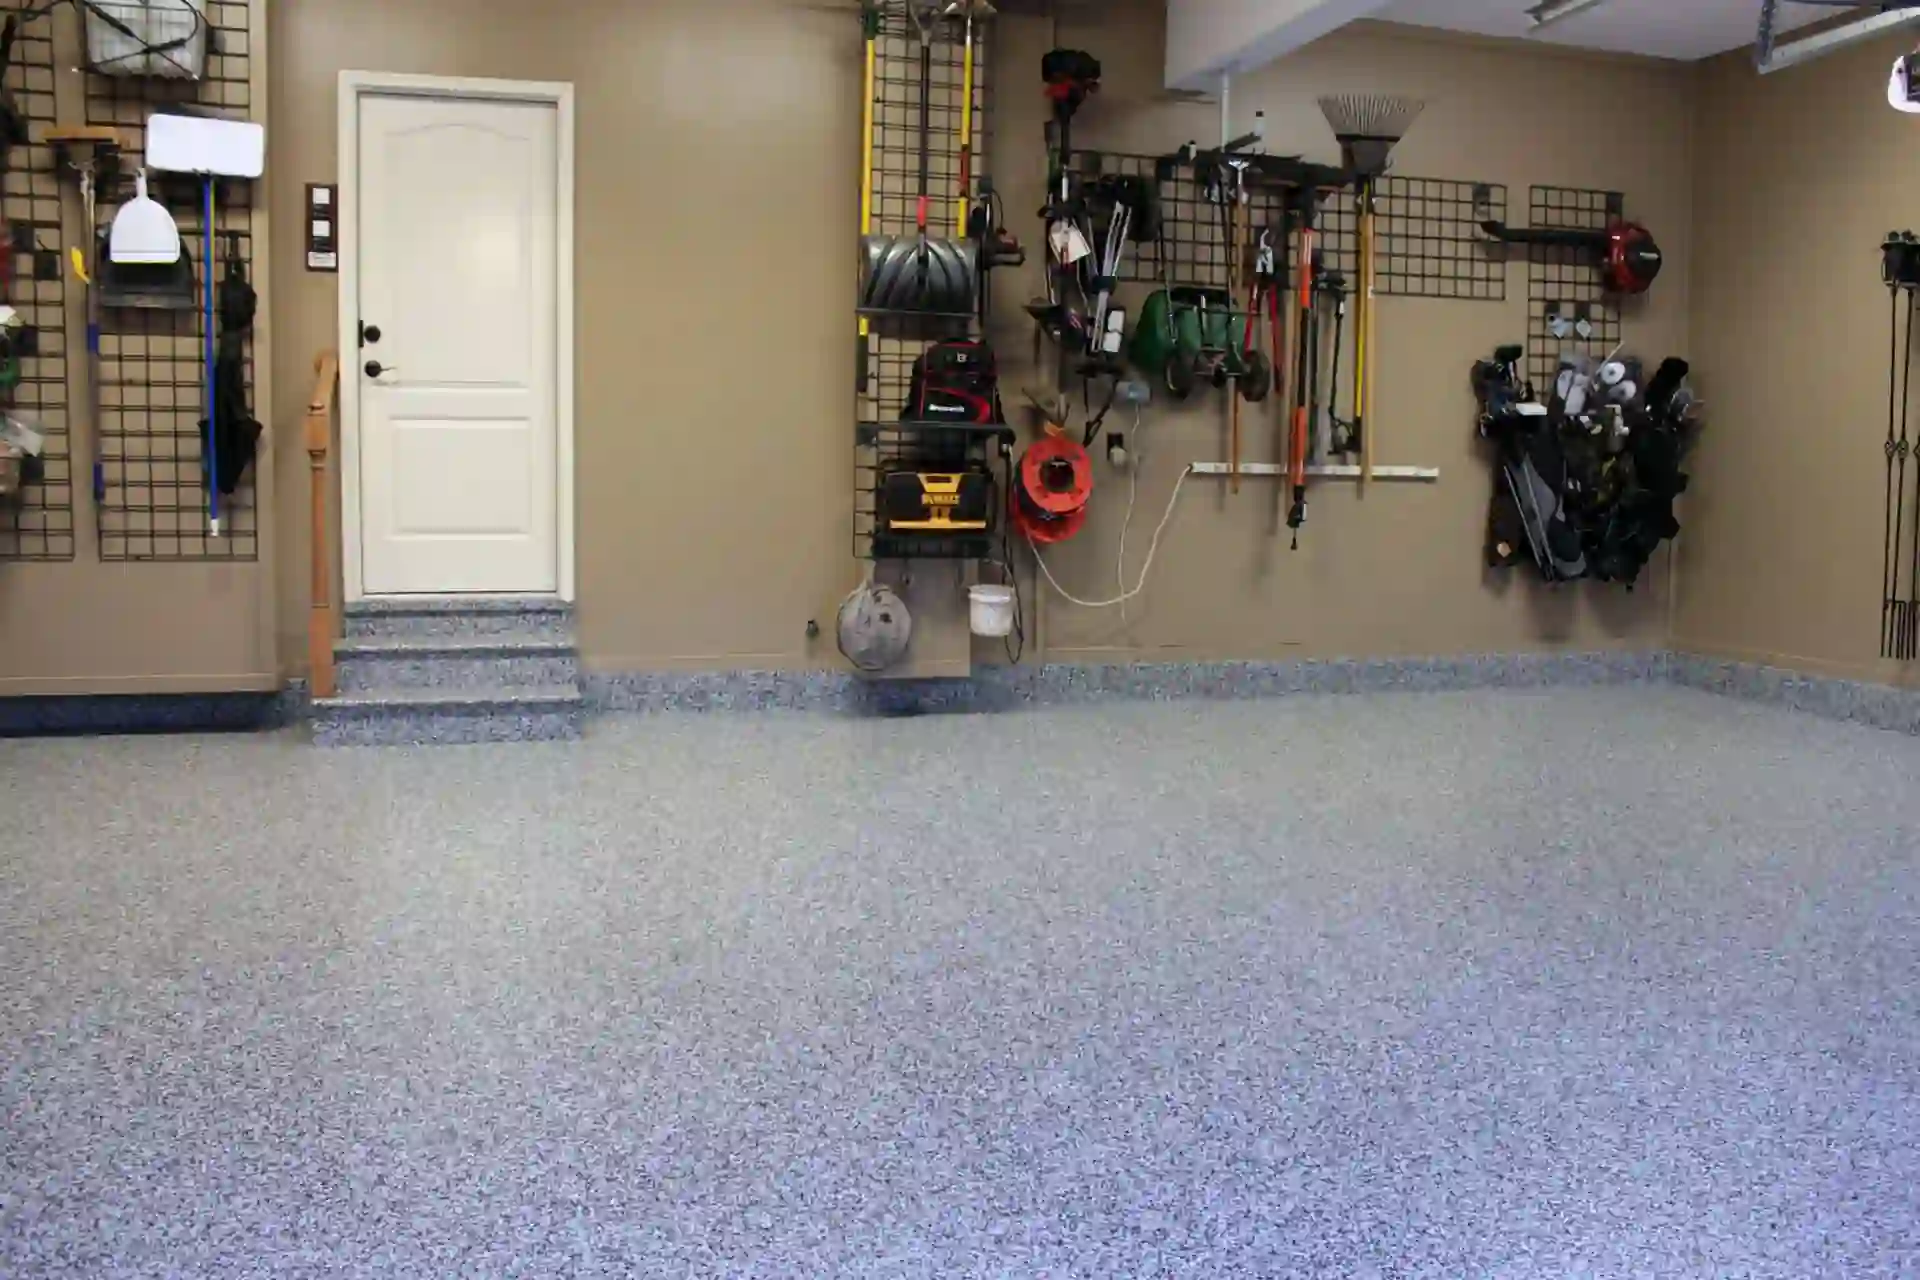
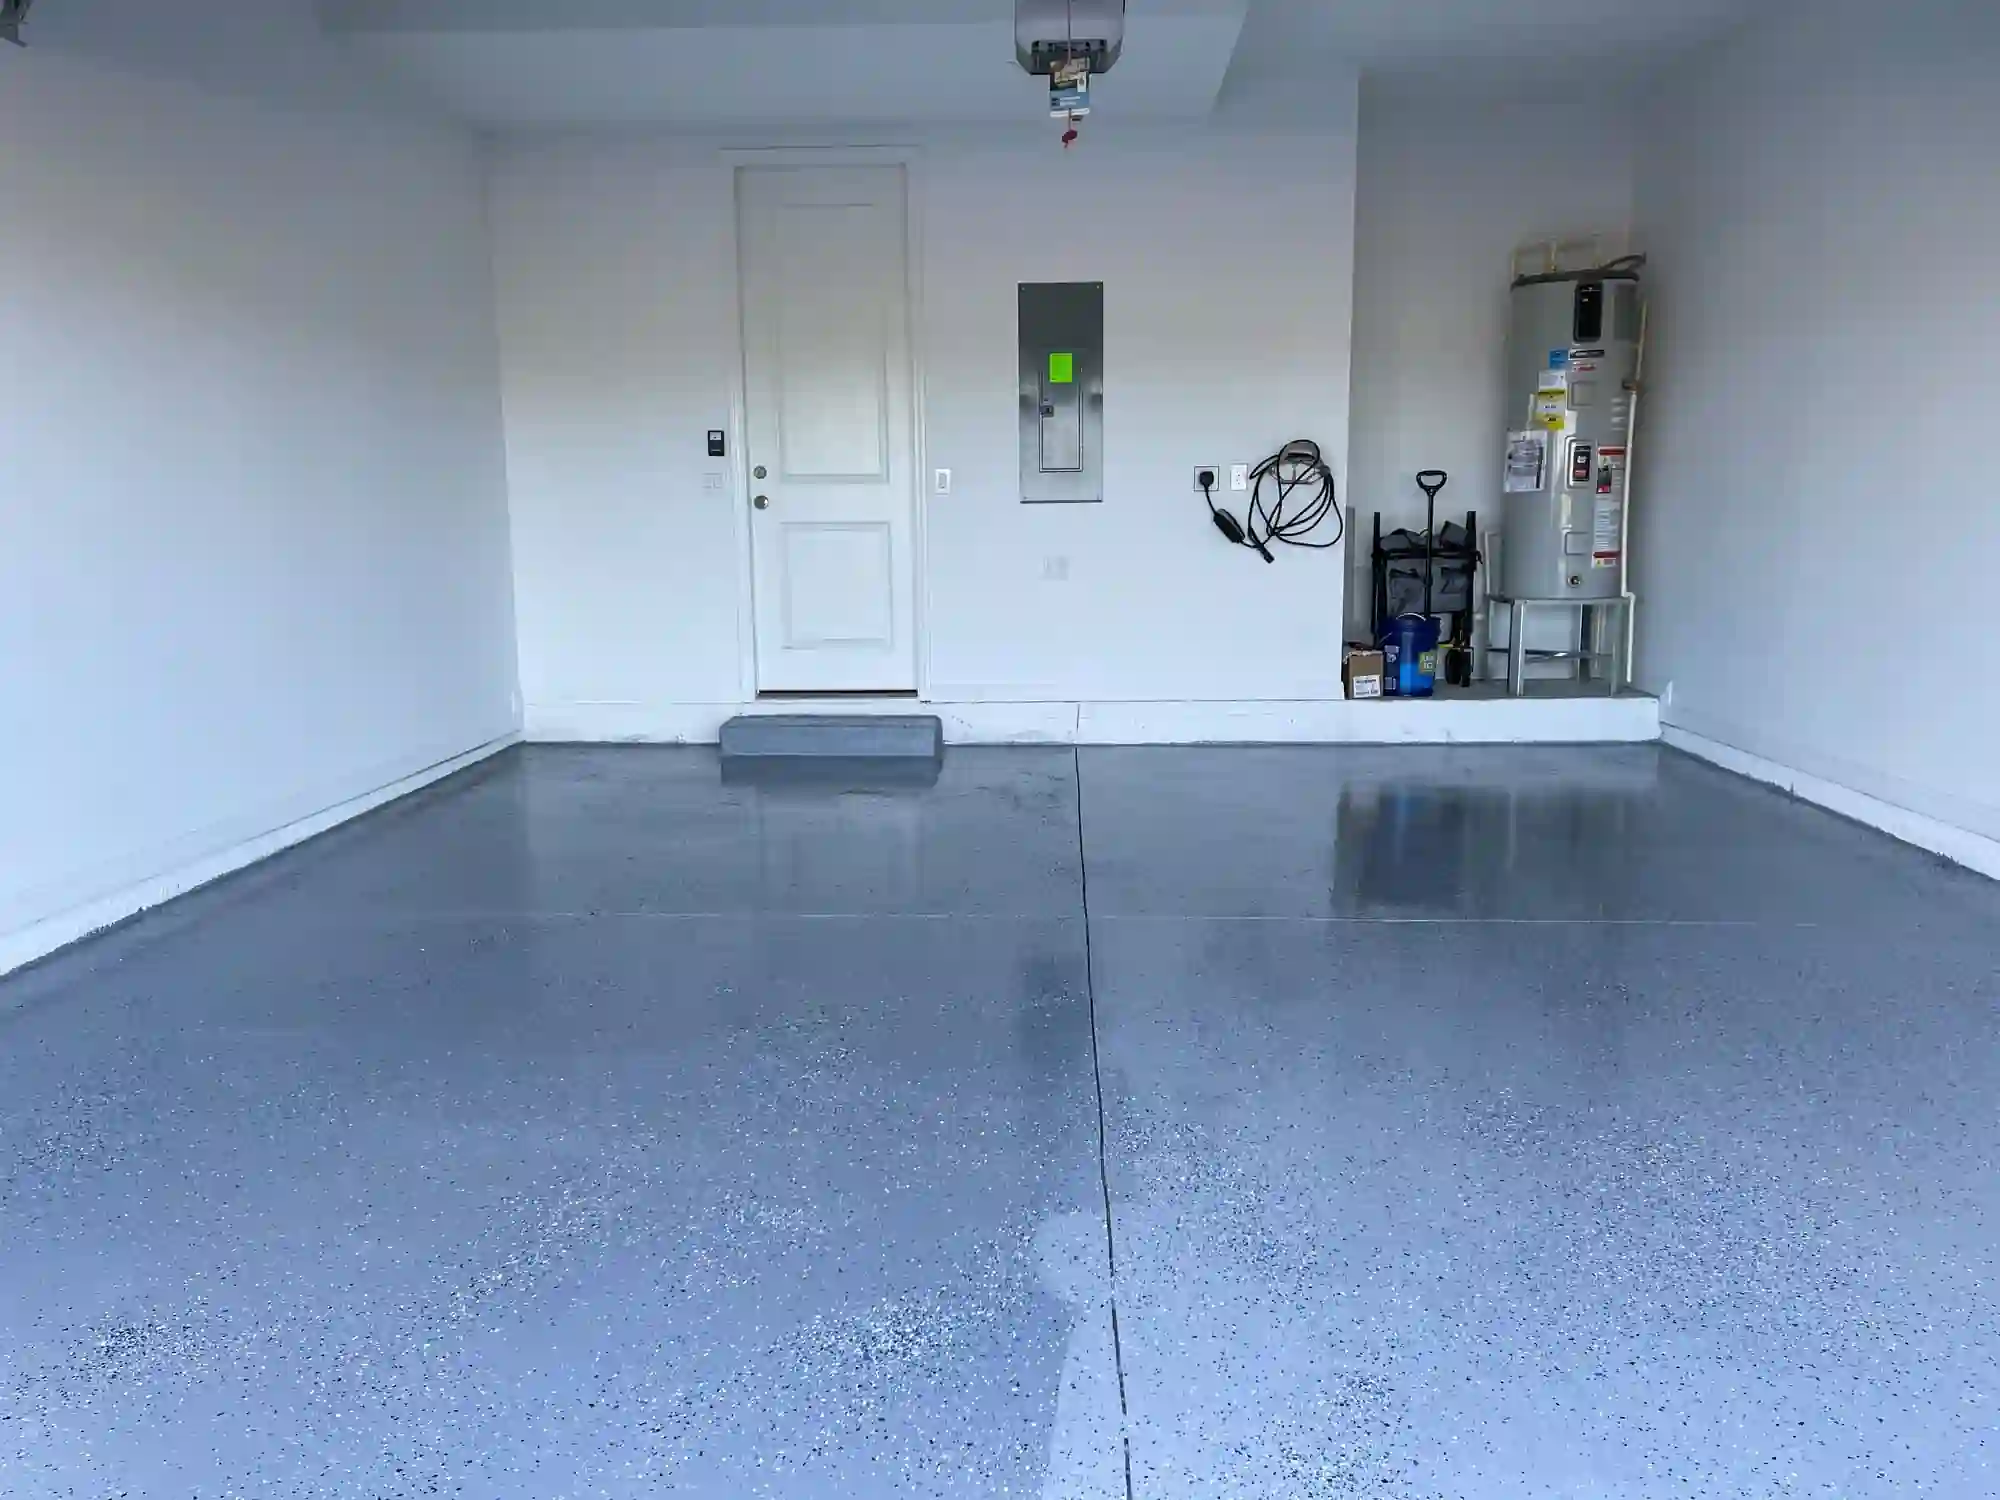
Aesthetic Finish — Custom Colors and Flake Options
Some people just want their garage to work. Others want it to look amazing too.
Luckily, polyaspartic coatings offer both. You can choose from a full-size color chart that includes everything from clean grays to bold blues, plus custom decorative flakes that mimic granite or terrazzo.
It’s not just for looks either — flakes add texture, which means better slip resistance under wet or oily conditions.
Low VOCs — Better for Indoor Air Quality
Let’s talk about something less flashy, but really important: your lungs.
Polyaspartic coatings typically release low VOC emissions, which means fewer toxic fumes and less air and water pollution. If you’re working indoors — or live with kids, pets, or anyone with asthma — this really matters.
Compare that to some older epoxy products that come with strong odors and potential health risks, and you’ll see why more people are choosing the safer option.
Quick Recap — Why Polyaspartic Wins in 2025
| Feature | Why It Matters |
|---|---|
| Fast Cure Time | Use your garage same day — no downtime |
| UV Resistance | No fading, even with daily sunlight |
| Chemical & Scratch Resistant | Stands up to spills and wear |
| Slip Resistance | Safer for walking, working, and kids |
| Low VOC | Safer for your health and the environment |
| Visual Appeal | Stylish options with decorative flakes |
When you combine all this — fast curing, no yellowing, easy cleaning, custom design, and solid protection — it’s hard to argue against it. And sure, epoxy is still hanging in there, especially for budget installs. But in 2025, more homeowners are saying, “If I’m going to do this, I might as well do it right.
4. Polyaspartic vs. Epoxy: Which Coating Wins in 2025?
Let’s be honest — for a long time, epoxy garage floor coatings were the gold standard. If someone said “garage floor upgrade,” epoxy was the default. But in 2025? It’s different now. People are doing the research, and polyaspartic isn’t just showing up in the conversation — it’s leading it.
That said, epoxy still has its place. If you’re tight on budget or doing a basic job where long-term wear doesn’t matter as much, maybe it’s still a decent pick. But let’s break it down properly — polyaspartic vs epoxy, head-to-head.
Durability Face-Off
Epoxy is tough. No one’s denying that. But polyaspartic floor coating is tougher.
Why? It resists scratches better, especially from dropped tools or sliding boxes. It also holds up against chemical spills, hot tire pickup, and abrasion from vehicle traffic — things epoxy coatings can eventually crack or peel from.
Pro Tip: If you use your garage as a workshop or store heavy equipment, go with a polyaspartic coating — the added abrasion resistance and chemical resistance pay off quickly.
Weather Resistance & UV Protection
Here’s a big one: UV stability.
Epoxy garage floors might look great for the first few months — but then come the yellow spots, discoloration, or dull patches. Especially if you live somewhere sunny, the lack of UV resistance becomes a serious downside.
Polyaspartic garage floor coating, on the other hand, is UV stable — thanks to its aliphatic polyaspartic coating makeup. No fading, no yellowing. Whether it’s for outdoor use like patios or a sunlit garage door opener, it just performs better.
Maintenance and Longevity
You don’t want to spend your weekends repairing floors. Here’s where polyaspartec floors make life easier.
| Maintenance Task | Epoxy Coating | Polyaspartic Coating |
|---|---|---|
| Cleaning (dust, spills) | Frequent, needs care | Quick, simple wipe-down |
| Crack/Chip Resistance | Moderate | Excellent |
| Recoating Needed | Every few years | Rarely — often decades |
| VOC Emissions (Air Quality) | Higher in many products | Low VOC – more eco-safe |
Polyaspartic coatings are also self-priming in many systems, which means fewer layers, less hassle, and a tighter bond during the installation process.
Cost Breakdown: Upfront vs. Long-Term Value
This one’s a bit tricky — because yes, polyaspartic garage floor coating tends to cost more per square foot. But that’s upfront.
Let’s take a closer look:
| Factor | Epoxy | Polyaspartic |
|---|---|---|
| Material Cost (avg) | $3–5 per sq. ft. | $5–8 per sq. ft. |
| Installation Time | 2–3 days | 1 day |
| Maintenance Cost (10 yrs) | Higher | Lower |
| Expected Lifespan | 3–5 years (sometimes 7) | 10–20 years (or more) |
Over time, the durable garage flooring benefit of polyaspartic saves you money. Less maintenance, fewer re-coats, and longer-lasting appearance.
Pro Tip: If you’re planning to sell your house or want a “set it and forget it” solution, polyaspartic coatings may even increase your home’s value — buyers love low-maintenance upgrades.
So, Is Epoxy Still Worth It?
Maybe. For some. If your garage gets minimal use — maybe you just store a few boxes or don’t care much about the aesthetics — epoxy might be “good enough.” It’s also still a common choice in entry-level garage renovation tips online.
But if you care about performance, appearance, or health risks from VOC emissions, polyaspartic takes the win.
And here’s the wild part: in 2025, the volume discount options for polyaspartic kits are improving, especially through brands like Garage Living or Resudeck Systems. So the price gap isn’t as wide as it used to be.
5. How to Install Polyaspartic Floor Coating the Right Way
So, let’s say you’ve made up your mind — you want that clean, durable, professional-looking garage floor that can actually survive real life. The next question is: can you install polyaspartic garage floor coating yourself?
Well… maybe.
Like most things, it depends. On your tools, your patience, your prep skills, and how much free time you’re willing to sacrifice. The installation process isn’t impossible for a DIYer, but it’s not exactly foolproof either.
Tools and Prep Work You’ll Need
Before you even touch the polyaspartic resins, surface prep is everything. A bad base coat = a bad finish. Period.
Here’s a simple checklist:
- Floor grinder or etcher (to prep concrete floors)
- Moisture test kit (watch for hydrostatic water pressure)
- Crack filler or patch kit
- Mixing drill and paddle
- Rollers, brushes, or squeegees (depends on application method)
- Safety gear (gloves, goggles, respirator — those VOC emissions can still linger a bit)
🧰 What You Need:
Pro Tip: Some DIY kits market themselves as “easy to apply” — and some are. Just make sure you check the mix ratio, full cure time, and safety data sheet before you dive in. If it sounds too simple, it probably skips a step you’ll regret later.
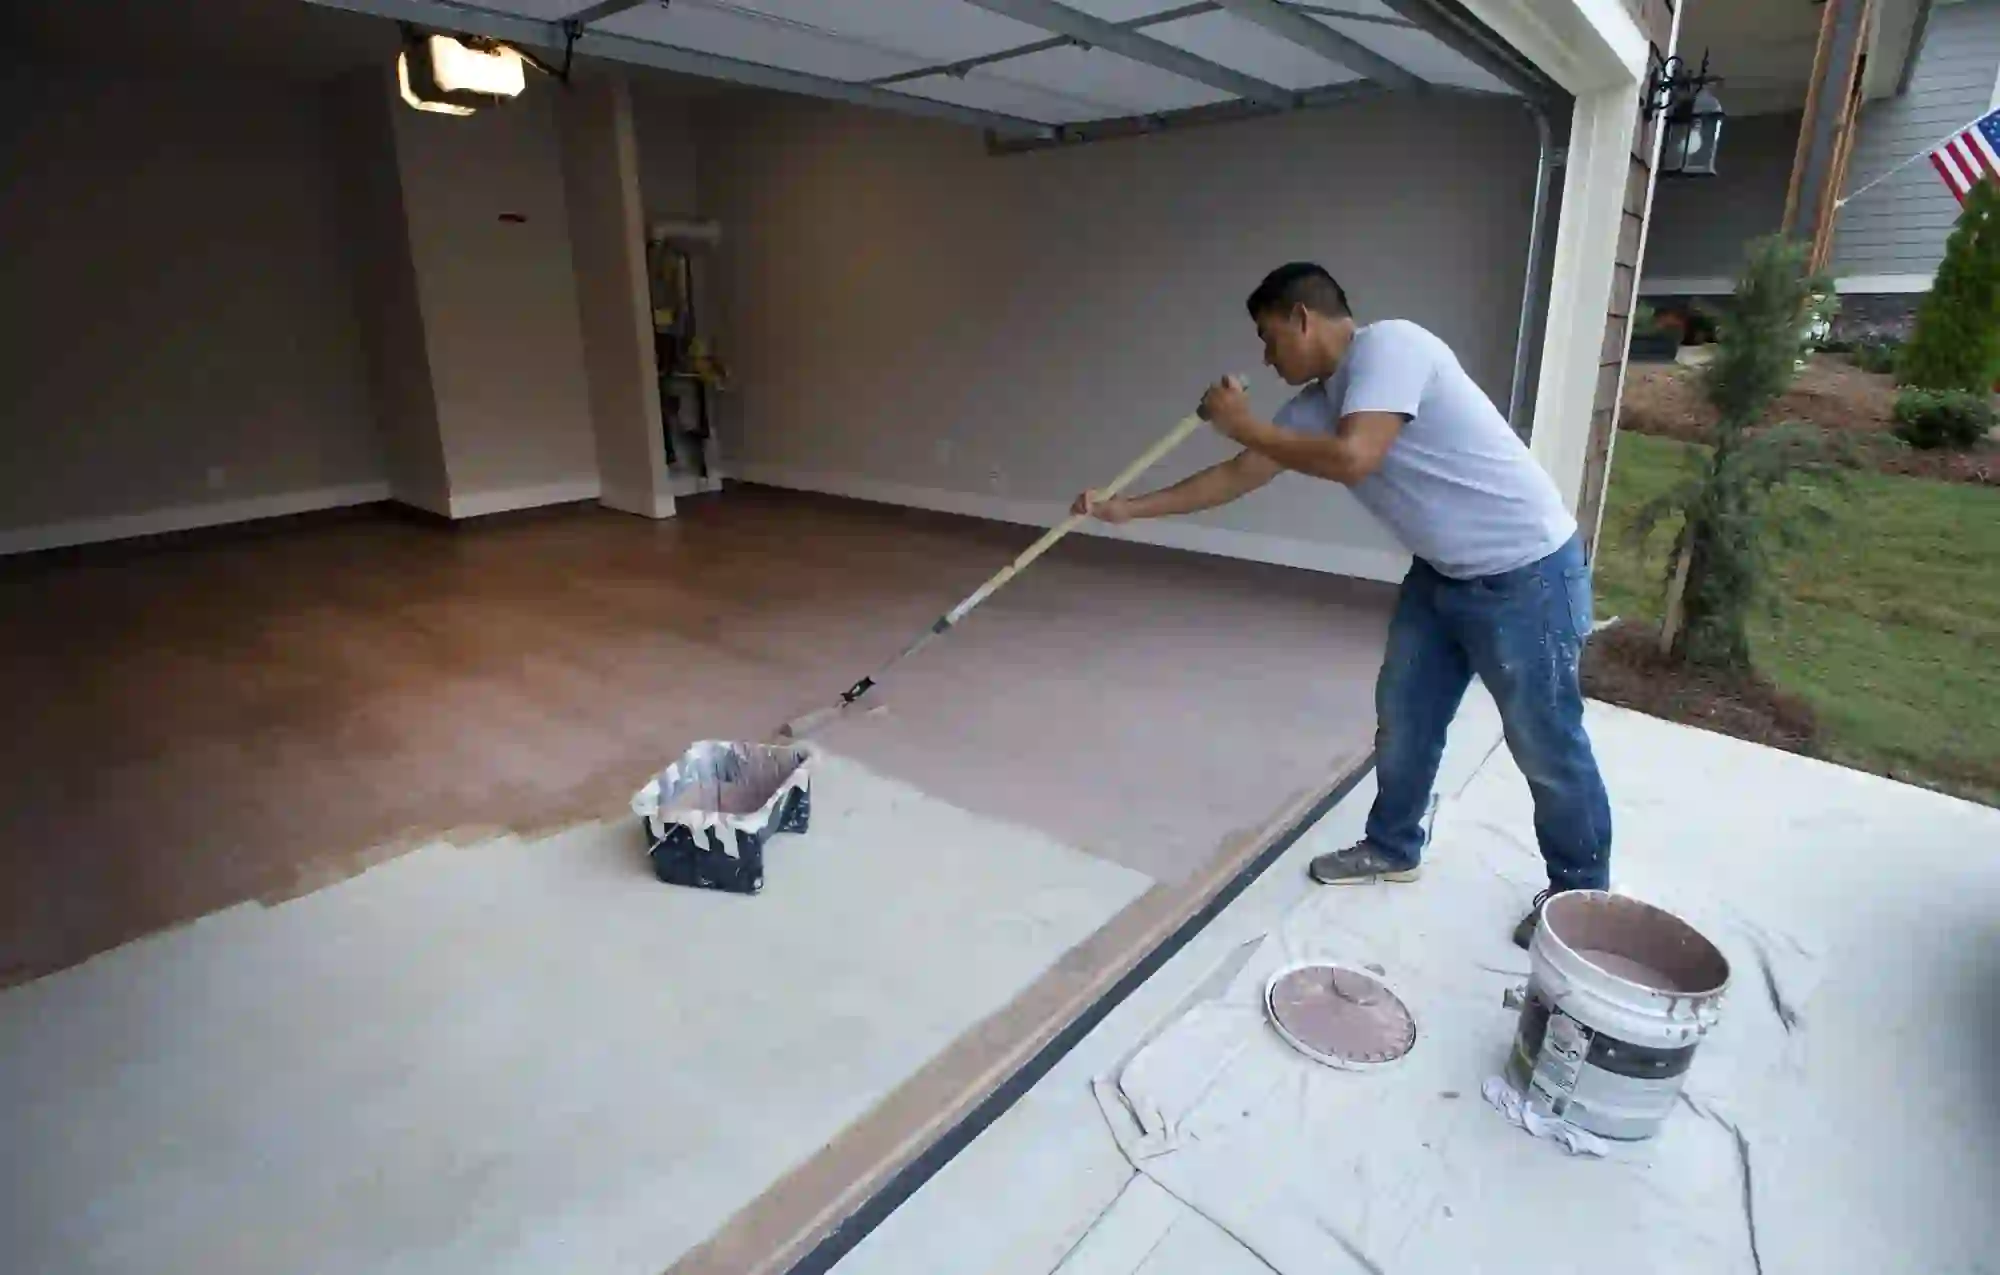
Step-by-Step Installation Process (DIY Route)
- Surface Preparation
- Clean the garage thoroughly.
- Grind or etch the surface to roughen it for adhesion.
- Fill cracks and let everything dry fully.
- Moisture Testing
- Check for vapor or water seeping through the slab.
- If there’s consistent moisture, you may need a vapor barrier or reconsider.
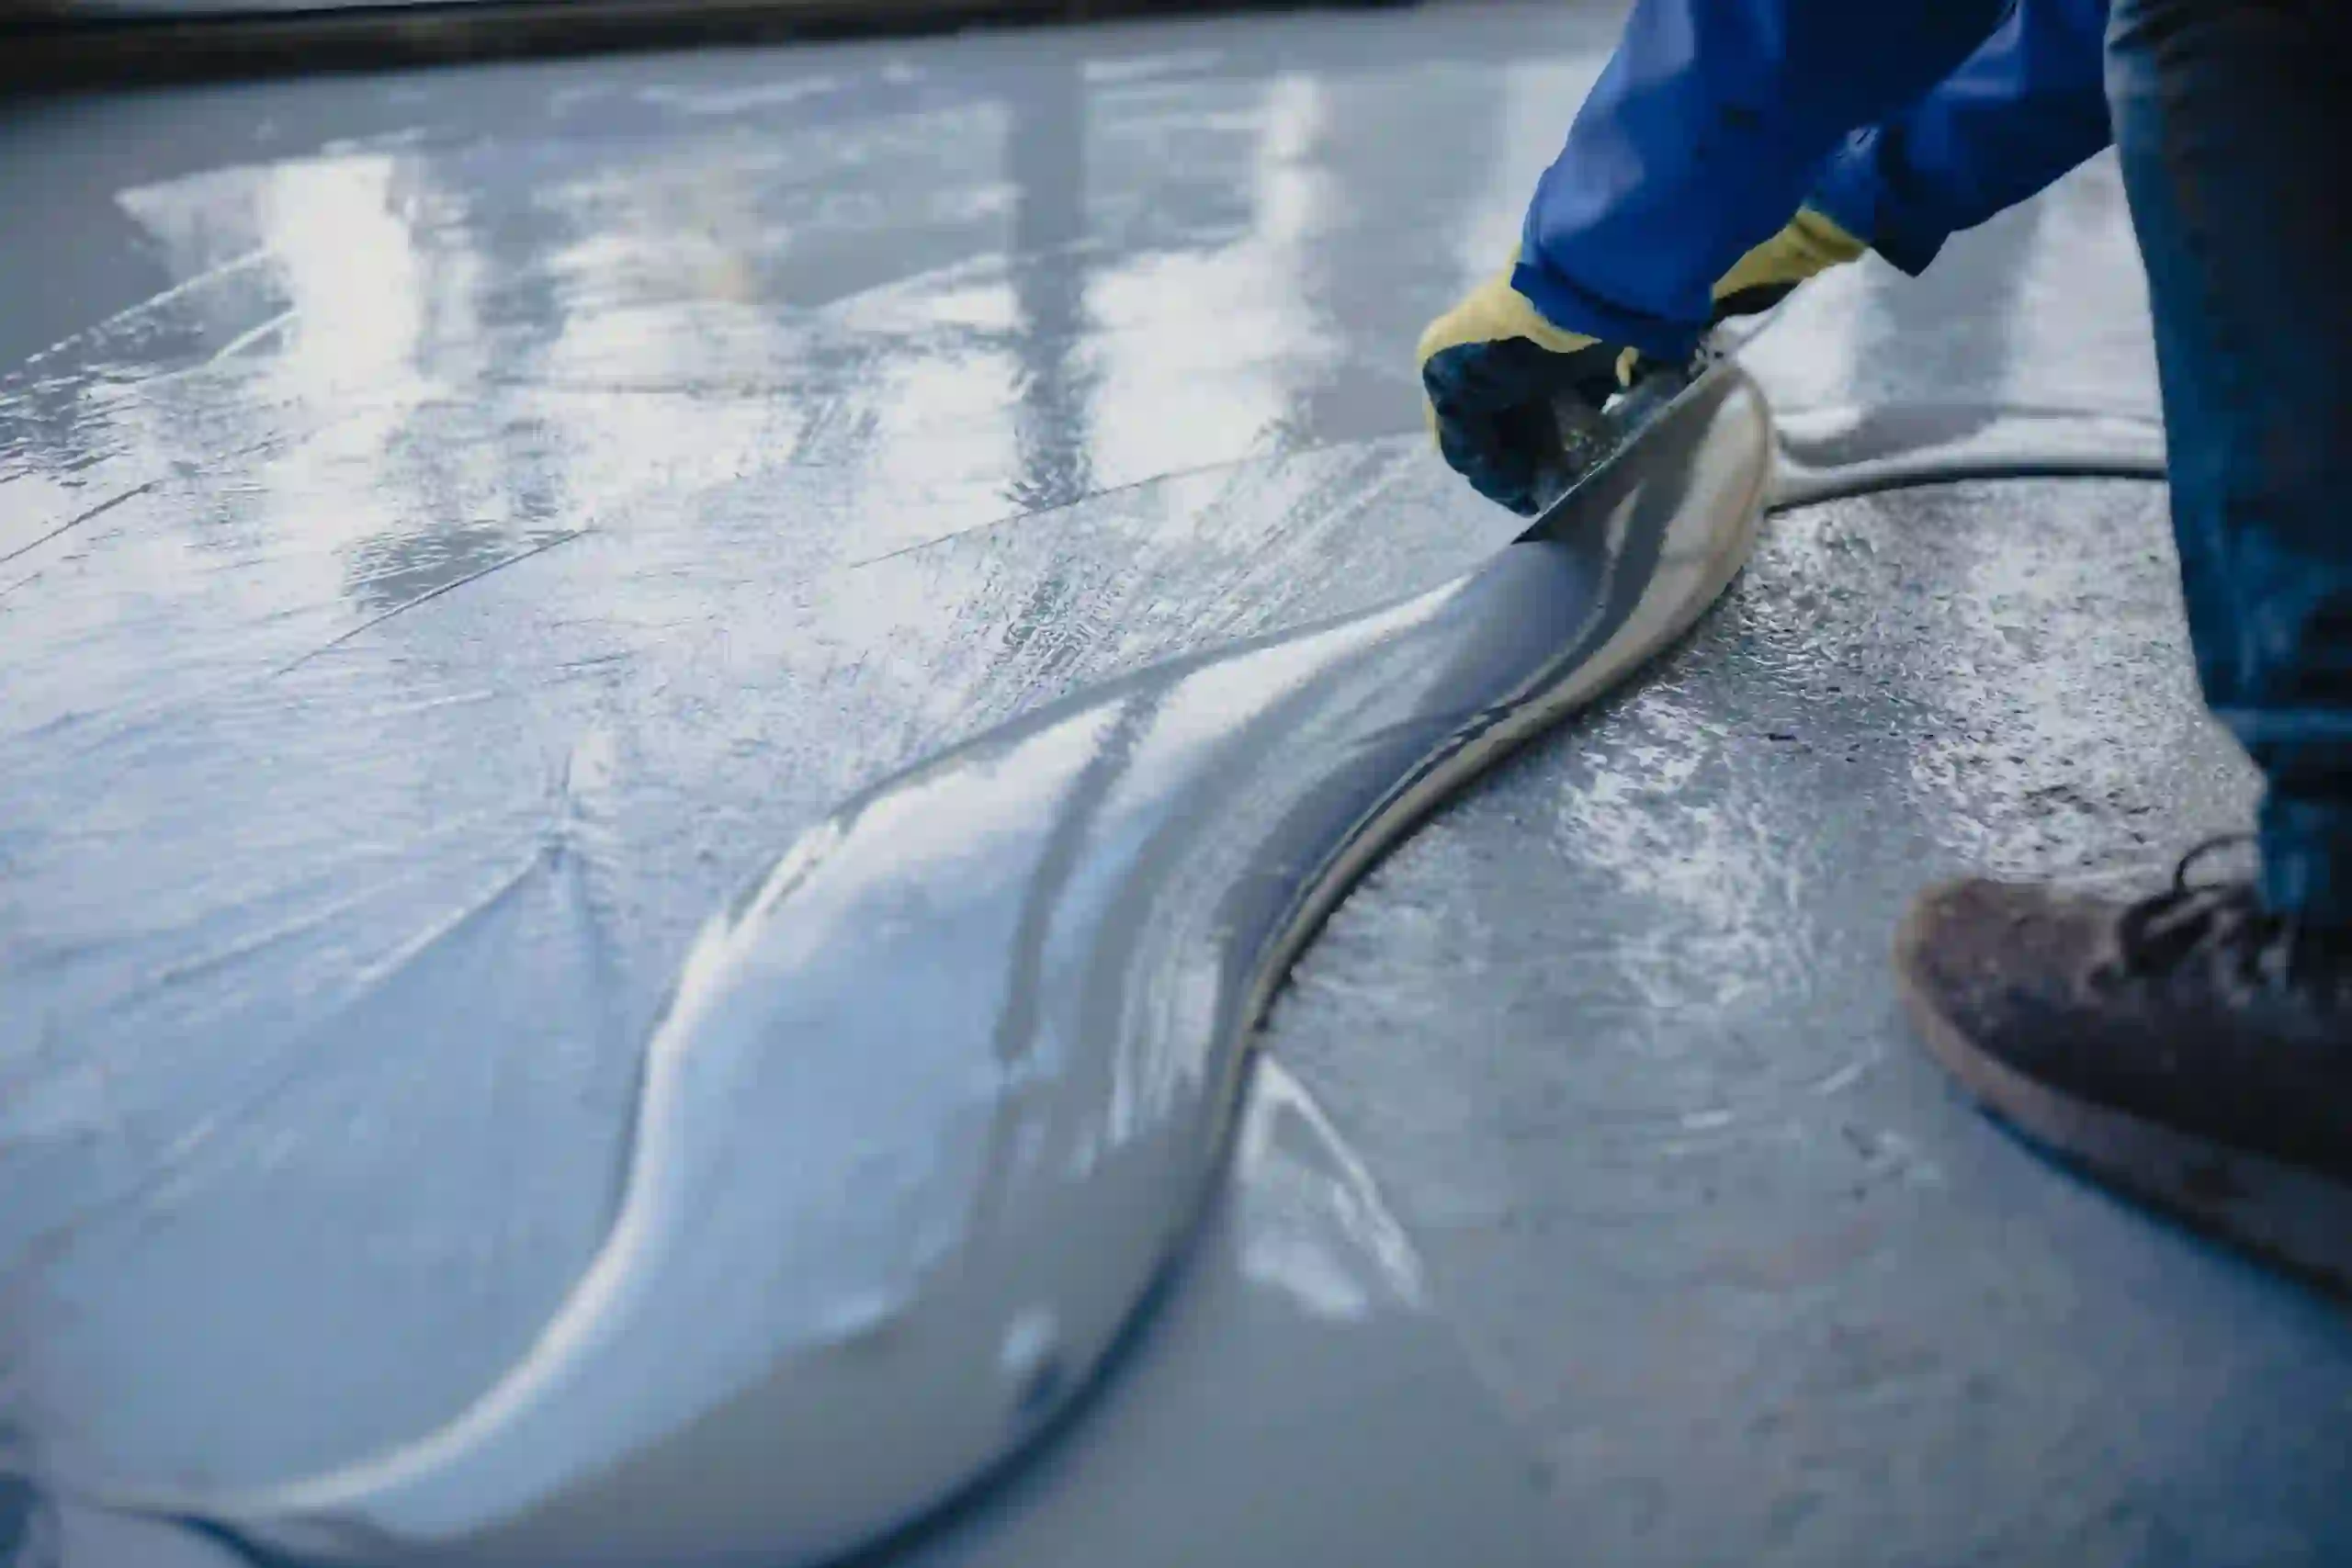
- Mix Your Coating
- Carefully follow manufacturer guidelines for mixing the polyaspartic coating.
- Timing matters — this stuff can begin curing fast.
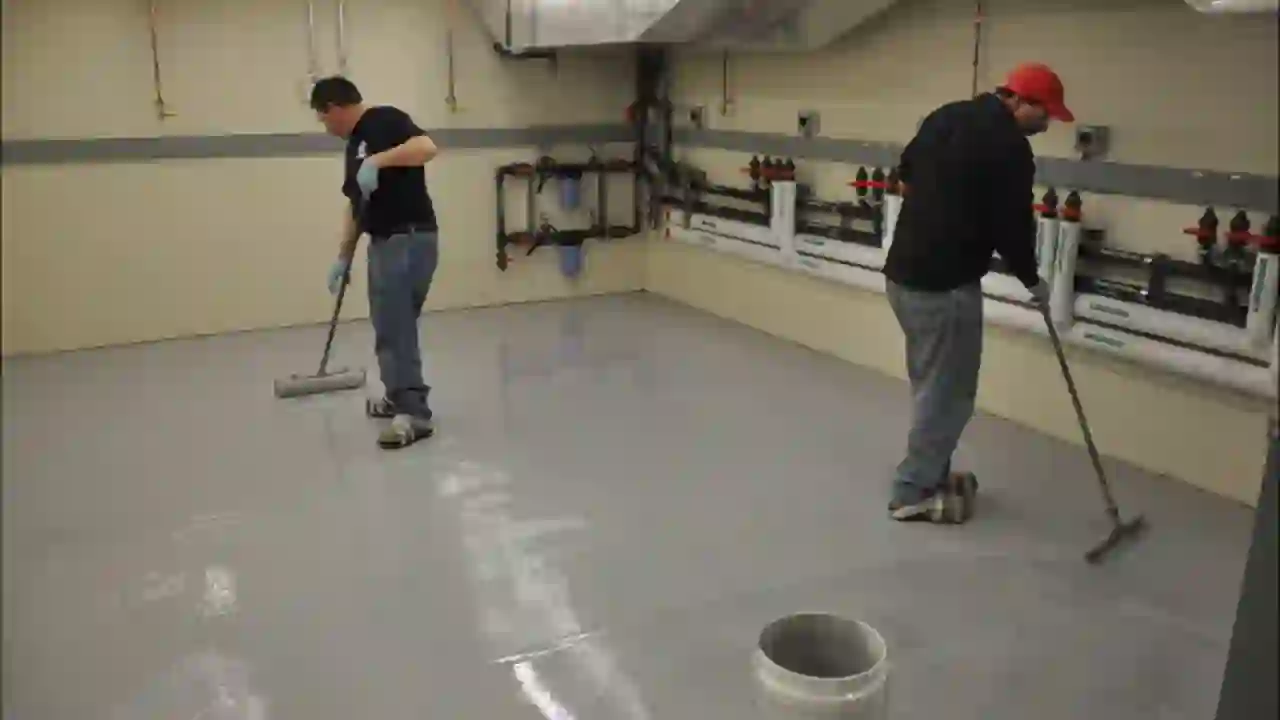
- Apply Base Coat
- Use a roller or squeegee for even spread.
- Work in sections to avoid overlap marks.
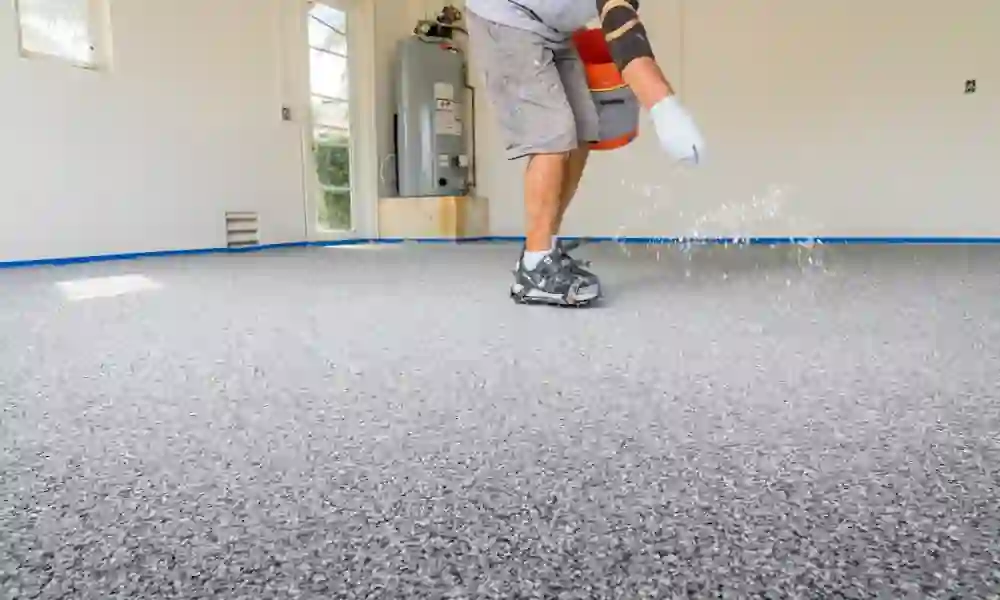
- Broadcast Decorative Flakes (Optional)
- While the base coat is still tacky, toss in flakes if you want texture or color.
- Apply Top Coat
- After the base has cured (usually within an hour or two), roll on the top coat.
- This seals everything and enhances abrasion resistance and slip resistance.
- Wait for Full Cure
- Some coatings cure in 2 hours. Others need 24–48. Don’t rush it.
- Check the product’s full cure time and stay off the surface until it’s ready for vehicle traffic.
When to Hire a Professional Installer
Let’s be real: not everyone wants to mess with grinders, vapors, or unexpected floor bubbles.
Hiring a professional might be a better fit if:
- Your garage is large or has a lot of damage.
- You’re worried about air and water pollution from mishandled chemicals.
- You want a flawless finish, fast — especially with vertical applications or tricky edges.
- You’re installing high-end brands like Resudeck Systems or need a lifetime warranty from providers like Garage Living.
Here’s a quick table to help you decide:
| Factor | DIY Route | Professional Installation |
|---|---|---|
| Cost | Lower upfront | Higher upfront |
| Tools Required | Many (grinder, PPE, etc.) | None (installer provides) |
| Risk of Mistakes | Moderate to High | Low |
| Finish Quality | Variable | Consistently high |
| Time Needed | 2–3 days (plus prep) | Often done in 1 day |
| VOC Safety | Depends on product | Managed with pro gear |
Pro Tip: If you’re installing over old epoxy or dealing with concrete floors that have moisture issues, hiring a pro could save you hundreds in rework and stress.
6. What Does a Polyaspartic Floor Coating Cost in 2025?
Let’s talk about the part that everyone eventually gets to — the price.
So you’re probably wondering: How much does a polyaspartic garage floor coating really cost in 2025? And is it worth it compared to something like an epoxy floor?
Short answer: It depends… but also yes. Especially if you care about long-term durability, appearance, and never thinking about your garage floor again for the next 10 to 20 years.
Also Read For More Information: How Much Does Garage Door Cable Repair Cost in 2025?
Price per Square Foot Breakdown
On average in 2025, here’s what you’re looking at:
| Coating Type | DIY Cost (Per Sq. Ft.) | Pro Installed (Per Sq. Ft.) |
|---|---|---|
| Epoxy Garage Floor | $3 – $5 | $5 – $8 |
| Polyaspartic Floor Coating | $5 – $7.50 | $8 – $12+ |
The cost of polyaspartic flooring is higher — no denying that. But you’re also getting better UV resistance, faster cure times, improved chemical resistance, and less maintenance. So while the upfront number might sting a little more, it usually pays off in fewer repairs and longer performance.
Factors Affecting Final Cost
Your actual cost can shFift a lot depending on a few real-world details:
🔍 What Impacts Your TFactors Affecting Final Cost
Your actual cost can sotal Price?
- Size of GaFactorrage: Bigger space = more material = higher price (obviously).
- Surface Preparation: Cracks, oil stains, or moisture issues? That adds labor and time.
- Location: Urban areas or colder climates may increase labor costs.
- Custom Options: Adding decorative flakes, high-gloss finishes, or anti-slip additives? More $$.
- Brand and Product Line: Some high-end options like Garage Living or CFS-1C Polyaspartic Single Component Coating cost more — but usually last longer.
- Self Installation vs. Pro: If you’re confident and skilled, self-installation might save a bit, but mistakes can end up costing more in the long run.
Pro Tip: Ask about volume discounts if you’re coating more than just your garage — like a workshop or basement. Some suppliers or installers offer price breaks at certain square footage thresholds (a.k.a. “discount levels”).
Is It Worth the Investment?
For many homeowners in 2025, yes — it really is.
If you’re already investing in garage upgrades — shelving, lighting, insulation — why leave the floor vulnerable? A good polyaspartic garage floor coating gives you floor protection, safety, and something you’ll actually enjoy looking at.
Plus, with features like:
- Low VOCs for healthier indoor air
- Resistance to chemical spills, abrasion, and hydrostatic water pressure
- High-end finishes with slip resistance and UV stability
- A potential lifetime warranty from pro installers
…it’s hard to argue against it.
Still, if your budget is tight and you’re okay with touch-ups every few years, epoxy garage floors might be enough for now. But keep in mind: polyaspartic’s lower maintenance cost over time often balances out the initial difference.
7. Keeping Your Polyaspartic Floor Looking Brand New
One of the most satisfying things about choosing a polyaspartic garage floor coating is that you don’t have to baby it. You can actually use your garage — like, really use it — without stressing over every spill or tire mark.
But even the toughest polyaspartec floor needs a little love from time to time.
So, how do you keep your floor looking like it was just installed… even 5 or 10 years later?
Cleaning Tips for Daily Use
Here’s the good news: cleaning polyaspartic floor coatings is weirdly easy. There’s no sealing, no waxing, no stripping involved. Just a bit of regular care goes a long way.
🧽 Basic Garage Floor Cleaning Routine:
- Dust or sweep weekly — especially in high-traffic areas.
- Use a damp mop with mild soap every couple of weeks or as needed.
- Avoid harsh cleaners — no acid-based stuff or bleach.
- Remove chemical spills quickly — although the coating is chemical resistant, letting oil or battery acid sit for days isn’t ideal.
If your garage is more like a workspace or auto shop, you might clean more often. But for most homeowners? A quick sweep and an occasional mop does the job.
Pro Tip: Skip the steam mop. While polyaspartic coatings are known for their water resistance, extreme heat or pressure isn’t necessary — and in some rare cases, it could reduce long-term adhesion around seams.
Preventing Damage from Tools, Tires, and Chemicals
You probably won’t ruin your floor — that’s kind of the point of polyaspartic garage floor coatings. But there are still a few common-sense precautions you can take to extend its life.
🛠️ Smart Habits for Longevity:
- Use rubber mats under heavy workbenches or tool chests to prevent wear from dragging.
- Don’t turn steering wheels in place — that torque can eventually scuff the surface over time.
- Watch for sharp metal edges — dropped tools won’t usually chip it, but repeated hits in the same spot? Maybe.
- Limit exposure to strong solvents — things like paint thinners or acetone, even though the surface is designed to handle them, should still be wiped up quickly.
Can I Re-Coat It If It Wears Down?
Yes — and it’s easier than you might think.
Most polyaspartic floor coatings can be lightly sanded and re-coated without removing the original layer. As long as the base is still bonded to the concrete (which it usually is, thanks to great adhesion), you just clean, prep, and apply a fresh top coat.
This also means you can change up the finish years down the line — add more decorative flakes, switch from matte to gloss, or adjust the slip resistance for safety.
Maintenance Summary
| Task | Frequency | Notes |
|---|---|---|
| Sweeping/Dusting | Weekly | Keeps grit from scratching |
| Mopping | Biweekly or Monthly | Use mild soap, no abrasives |
| Spill Clean-Up | As Needed | Especially for oil or solvents |
| Re-Coating (if needed) | Every 8–15 years | Only if surface shows wear |
| Inspection for Damage | Annually | Look for chips or worn spots |
8. What Homeowners Are Saying About Polyaspartic Coating
Alright, so you’ve heard the specs. The fast cure times, the UV resistance, the chemical resistance… all that good stuff.
But what about actual people using polyaspartic garage floor coating in real life? What are they saying in 2025?
Are they thrilled? Regretful? Somewhere in between?
Let’s look at what’s being shared — not just from marketing brochures, but from actual garage owners, DIYers, and a few professional installers too.
Testimonials from Garage Owners in 2025
“Honestly, I didn’t even know what polyaspartic was six months ago.”
– Jamal, San Diego homeowner
“I was all set on epoxy until my installer walked me through the benefits of a polyaspartic coating. Fast forward to now — zero yellowing, no tire marks, and I still haven’t cleaned it since the install. Which… okay, I should. But still.”
“Winter salt used to destroy my floor. Not anymore.”
– Priya, Detroit auto tech
“Our garage sees constant abuse — vehicles, oil, snow, salt. We upgraded to a polyaspartec floor system from Resudeck, and it’s honestly been bulletproof. I used to patch epoxy every couple years. Haven’t needed to touch this one.”
“I installed it myself… and I survived.”
– Mike, DIYer from Boise
“It wasn’t easy — the surface prep was brutal — but I used a CFS-1C Polyaspartic Single Component Coating, followed the mix ratio, and got a surprisingly pro-looking finish. Took me two full days, but saved $1,000+ compared to hiring someone.”
Also Read For More Information: How To Open Garage Door Without Power Quickly?
Before & After Success Stories
Sometimes the transformation is what really hits home. Here’s a quick glance at what people are sharing online (and yep, most of it’s from their phones, not fancy photo setups):
| Project Type | Before (Epoxy or Bare) | After (Polyaspartic) |
|---|---|---|
| 2-Car Residential | Cracked concrete, yellowed epoxy | Smooth flake finish, full gloss top coat |
| Workshop Floor | Dusty, stained slab | High-grip, anti-slip gray + black flake |
| Outdoor Patio | Faded, peeling epoxy | UV-stable polyaspartic in tan earth tones |
| Motorcycle Garage | Oil-soaked concrete, dark spots | Chemical-resistant, light gray polyaspartic |
Pro Tip: If you’re doing a garage renovation in 2025, browse local contractor portfolios or Reddit before-and-after threads — they often show vertical applications, edge detail, and slip resistance upgrades you might not think about.
Ratings from Professional Installers
We also checked in with a few pro installers who’ve shifted to polyaspartic over the past few years:
🛠️ What the Pros Are Saying:
- “We use polyaspartic resins almost exclusively now — faster install times and fewer callbacks.”
- “Clients love the look, but the real win is in the low VOC emissions and air safety.”
- “It’s more forgiving with weather changes during install. Makes our lives easier, honestly.”
And many mention that polyaspartic is better for clients with health risks or those concerned about air and water pollution — a growing concern for families in urban areas.
Challenges People Faced (And Solved)
To keep it real — not every install goes perfectly. A few common hiccups that came up:
- Rushed surface prep → delamination later
- Wrong mix ratio → uneven curing or streaks
- Installing in cold temps → longer cure time than expected
- Moisture in slab → bubbling under coating after a week
All of these, though, were preventable with the right prep and product selection. And most reviewers still said they’d choose polyaspartic coating again — just with better planning.
Final Thoughts
Okay, so — we’ve covered a lot. From what polyaspartic garage floor coating actually is, to how it stacks up against epoxy, to the real-world cost, care, and feedback from people who’ve already taken the plunge.
And maybe, even now, you’re still not sure. Totally fair.
Because, let’s be honest — garage floors don’t always feel like a priority. They’re dusty, they’re hidden, they’re… just the floor, right? But the truth is, more and more homeowners in 2025 are treating their garages like actual living space — or at least something worth protecting. Not just somewhere to dump tools and park the car.
That’s where polyaspartic garage floor coating stands out. It isn’t just a nice upgrade — it’s the kind of change you make once, and then don’t have to think about again for years. You get durability, looks, resistance to all the usual garage chaos — tires, tools, spills, even sun exposure. And you don’t have to babysit it like some of the older options.
So is it the right move for you?
Well… that kind of depends on what you want from your space. If you’re still patching up epoxy every few years, or stepping over stains and cracks every time you head to the freezer in the corner, then maybe it’s time to rethink what your garage could be. Clean. Tough. Safe. And honestly — something you’re kind of proud of.
Because this isn’t just about following a trend. It’s about choosing a finish that fits your real life.
And if that sounds like something you’re ready for? Then polyaspartic garage floor coating might be exactly what your garage has been waiting for.
Frequently Asked Questions:
1. Is polyaspartic better than epoxy?
Yes, in most cases. It’s tougher, more UV-stable, and lasts longer with less upkeep than epoxy.
2. Can I install it myself?
You can, but only if you’re confident. Surface prep and mixing are key. Otherwise, a pro is safer.
3. How long does it take to cure?
Usually walkable in a few hours, and ready for cars in 24. Full cure may take longer depending on weather.
4. Will it fade in sunlight?
No — polyaspartic coatings are UV stable and won’t yellow or fade like traditional epoxies.
5. Is it safe for indoor use?
Yes. Most are low VOC and better for indoor air quality. Just check the safety data sheet to be sure.
6. What colors can I get?
Lots! From solid tones to decorative flakes. Many suppliers offer a full color chart to choose from.
7. What’s the 2025 price?
DIY costs $5–7.50/sq. ft. Pro installs run $8–12+. Prep, size, and finish all affect the price.
8. How do I clean it?
Just sweep and mop with mild soap. Avoid steam or strong chemicals — they’re overkill.
9. What if it gets damaged?
Most scratches can be buffed or re-coated. No need to strip the old layer like epoxy.
10. Is there a warranty?
Often, yes — especially with pro installers. Some even offer a lifetime warranty.