
A broken garage door can disrupt your daily life. One common reason for this is a broken garage door cable. Though it may seem hard to fix, you can repair it if you know what to do and have the right tools.
This easy guide will help you through the steps, using simple words and helpful tips.
We will talk about how garage door cable repaired, and the signs that they are damaged, and provide a step-by-step repair guide.
We will use common tools like cable clamps. It’s also important to check that your tools work well with your garage door opener and extension springs for a good repair.
Key Takeaways
- A broken garage door cable can disrupt your routine and pose safety risks.
- This guide provides a step-by-step approach to repairing your garage door cable safely and effectively.
- We’ll cover the necessary tools, safety precautions, and troubleshooting tips.
- Remember to prioritize safety when dealing with garage door springs and mechanisms.
- For complex issues or if you’re uncomfortable with DIY repairs, seeking professional help is always recommended.
- By following these steps, you can restore your garage door’s functionality and ensure its smooth operation.
Understanding Garage Door Cables
Garage door cables are very important for your garage door system, but they often get ignored until they break. These cables help your door open and close smoothly and stay balanced. They are made from strong galvanized steel and handle constant pressure to support the door’s weight.
These cables connect to the bottom bracket on both sides of the door. They turn around a cable drum that is part of the torsion spring system. This system works well to balance the door’s weight. When a cable breaks, it throws off this balance. It is important to fix a broken cable right away to avoid more damage or safety issues.
1. The Role of Cables in Garage Door Systems

Imagine trying to lift a heavy garage door by yourself. It would take a lot of strength. That’s why the smart system of cables and torsion springs is useful.
The cables are key. They connect the door to the strong torsion spring and allow the spring’s energy to help move the door.
When the door goes down, the cables make the torsion spring twist and store energy. When the door goes up, the spring unwinds and releases that energy to help lift the door.
This careful working together of the cables and torsion spring makes sure the door runs smoothly and doesn’t slam shut.
If the cables don’t work well, all the weight of the garage door falls on the torsion spring. That can put too much stress on the spring and might cause it to break.
So, it’s important to know how crucial the cables are for the garage door’s safe and long-lasting operation.
2. Signs Your Garage Door Cable Needs Repair
Recognizing the warning signs of a bad garage door cable is very important. This can help stop further damage and keep you safe. One clear sign is when the garage door has a hard time opening or closing. It may move unevenly or feel jolty.
Another warning sign is if you see damage on the cable. Check the cables closely for fraying, kinks, or broken strands, especially near the bottom bracket and the cable drum. If you find any problems like these, make sure to fix them right away.
Also, listen for any strange noises coming from the garage door opener or the door itself. Sounds like grinding, popping, or snapping during use can mean there’s an issue with the cable that needs your quick attention.
If you ignore these signs, the problem can get worse and could lead to bigger repairs or even dangerous situations.
Preparing for Garage Door Cable Repair
Before you start, it’s important to focus on safety and be ready with the right tools. A little preparation can save you from future problems. First, disconnect the power to your garage door opener. This will stop accidental openings or closings while you work on the repair.
Next, gather all the tools and materials you need beforehand. Having everything ready helps the repair process go smoothly and lowers the chances of interruptions. Now, let’s talk about some important safety precautions.
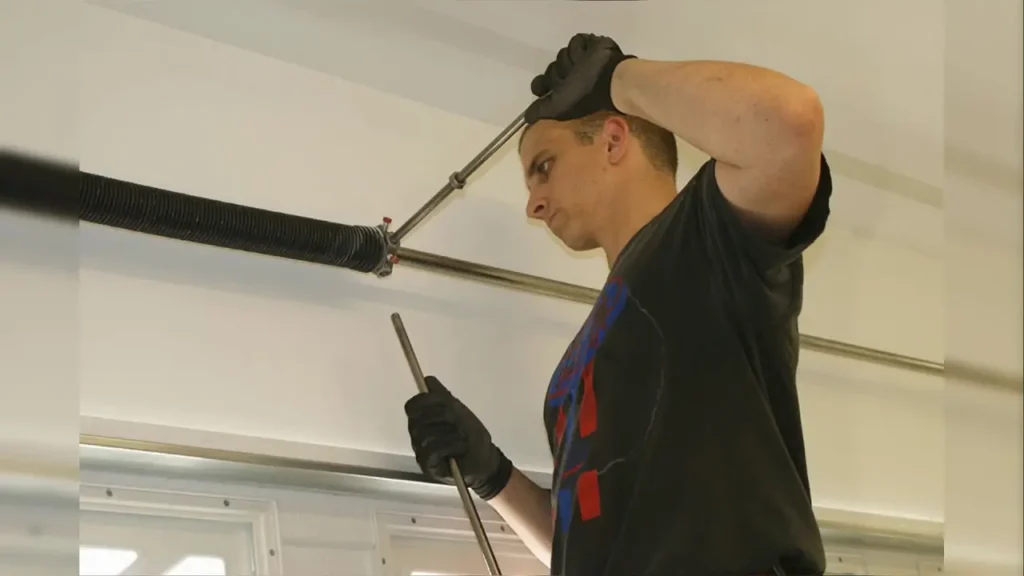
3. Safety First: What to Know Before You Start
When fixing garage doors, safety should always come first. The strong springs and parts involved can be very dangerous if not handled correctly. Before you start working, unplug the power source to the garage door opener. This helps stop any unexpected movements while you are working.
Also, don’t try to fix or adjust the garage door springs on your own. These springs have a lot of pressure and need special tools and skills to be handled safely. It’s best to let a qualified professional take care of any spring work to prevent injury.
In addition, wear the right safety gear. Use strong gloves and safety glasses to shield yourself from possible dangers. There can be sharp edges and heavy items. Protecting yourself with gear is very important for a safe repair experience.
4. Tools and Materials Needed for the Job
Gathering the tools and materials you need before you start will make your repair process easier and faster. Here is a list of what you’ll need:
- Replacement Garage Door Cable: Pick a cable that is the same size and length as your current one. Aircraft cables are a good choice because they are strong and last long.
- Winding Bars or Vice Grips: Use these tools to safely control the tension of the garage door springs.
- Pliers or Channel Locks: These help you loosen and tighten cable clamps and other garage door hardware.
- Hammer: A hammer is handy for tapping cable clamps into place.
- Screwdrivers (Flat-Head and Phillips): Keep them close for taking out and putting in screws during the repair.
- Wrench Set: A wrench set makes it easy to tighten and loosen bolts and nuts.
- Tape Measure: Get accurate measurements to make sure the new cable is the right length.
- Safety Glasses and Gloves: Wear these to keep your eyes and hands safe from hazards while you repair.
- Pulley Replacement Kit: While you might not always need it, it’s smart to have a pulley replacement kit ready in case you need to switch out old pulleys.
Having these tools ready will help you work faster, saving you time and reducing stress. Always focus on safety and ensure you have the right materials before starting your garage door cable repair. Remember, being prepared is key for a safe and successful job.
Step-by-Step Guide to Garage Door Cable Repair

Now that we’ve talked about the required preparations, let’s look at the steps to fix your garage door cable. Each step is very important for a safe and good result.
Take your time and pay attention to each step. By following these instructions and looking at the visual aids, you can feel sure you will do the repair right. You will have the support you need to finish the job well.
5. Step 1: Disconnecting the Garage Door Opener
Before you start working on the garage door, you need to disconnect it from its power source. This important safety step stops the garage door opener from turning on by mistake during repairs. Unplug the opener from the outlet or turn off the circuit breaker.
Next, find the emergency release cord. It is usually a red rope that hangs from the garage door opener’s mechanism. Pull this cord steadily to disconnect the opener trolley from the door. You will hear a clicking sound, which means the opener has been released correctly.
With the opener unplugged and the emergency release cord pulled, you can now move the door by hand without any problems. This is important for relieving the tension on the springs and allows you to work safely on the cables.
6. Step 2: Securing the Garage Door in Place
After you disconnect the garage door opener, lift the door to a good height for working on the cable. It is usually easiest if the door is raised about halfway. If the door feels really heavy or hard to lift, stop and call a garage door repair company. This could mean there is a serious problem.
Once the door is in the right open position, make sure to secure it with C-clamps or vice grips. Place these clamps on both sides of the door track. They should grip the tracks tightly to stop any movement. This keeps the door from closing unexpectedly while you work on the cable, helping to keep you safe.
Keep in mind that the weight of the door is mainly held up by the clamps now, so double-check that they are stable before you continue with the repair. Securing the door right helps create a safe work environment.
7. Step 3: Removing the Old Cable
With the door clamped securely, find the broken cable. One end is usually attached to the bottom bracket of the door, while the other is wound around the cable drum. Use pliers or channel locks to carefully loosen the cable clamps that hold the old cable to both the bottom bracket and the cable drum.
While you loosen the clamps, be careful of any tension that might still be in the cable. Having an extra pair of hands can help you manage the cable and stop it from snapping back suddenly. Once the clamps are loose, unwinding the old cable from the cable drum should be done carefully. Keep track of its path and how many times it wraps around the drum.
Dispose of the old cable properly. Then, prepare to install a new cable, following the same route as the last one. Make sure to pay attention to how the cable is placed and the number of turns around the drum to install it correctly.
8. Step 4: Installing the New Cable
With the old cable taken out, put the new cable through the right pulleys and guides, following the same way as the old one. Make sure the cable fits well in all grooves and lines up with the current setup. If you need help, use the old cable to guide you for the right path.
Next, attach one end of the new cable to the bottom bracket using the cable clamps. Then, carefully wrap the other end of the cable around the cable drum, using the same number of turns as the old cable. Make sure the cable wraps around the drum without any twists or kinks.
Tighten the cable clamps firmly, so the new cable is secure. After that, check the cable routing and tension to make sure it lines up properly with the pulleys and the drum. If needed, adjust the cable tension by carefully loosening the clamps and moving the cable’s position on the drum for smooth operation.
9. Step 5: Reattaching and Testing the Garage Door Opener
Once you have checked that the new cable is fastened and set up correctly, you can attach the garage door opener back. Gently lower the door until it is fully closed, making sure to take off the clamps. Next, plug the opener back into the power source. To reconnect the trolley, pull down on the emergency release handle until you hear a click.
Now that the opener is back on, test how the door works using the remote control or the wall switch. Watch the door carefully as it opens and closes. Listen for any strange sounds or signs that something is stuck. If the door moves easily and quietly, good job! You have fixed your garage door cable successfully.
It’s important to check the cable often for any damage. Make sure to grease the moving parts regularly, too. This will help keep the garage door in good shape and give you peace of mind knowing that it works safely and well.
Troubleshooting Common Issues

Even if you install everything carefully, you may still face some common problems. Don’t stress; these issues are usually simple to fix. Adjusting the tension or fixing small misalignments often solves the problem.
It’s important to keep safety in mind. If you are unsure about anything related to the repair, ask for help from a professional. It’s always safer to be cautious when working with these systems.
10. Adjusting Tension for Smooth Operation
One common problem after you replace a garage door cable is having uneven or wrong spring tension. If the door feels heavy on one side or sticks when opening, you will need to adjust the spring tension.
This will help make the door operate smoothly. But it is very important to remember that you should never try to adjust the torsion spring yourself.
Adjusting torsion springs can be very dangerous. Only a trained expert with special tools and skills should do this. Trying to fix the torsion spring on your own can lead to serious injury or damage.
Instead of adjusting the torsion spring, make sure the new cable you put in has the same tension as the old one.
You can do this by winding the cable the same number of times around the cable drum and making sure the clamps are tight and even. If you think there is a problem with the spring or you are unsure about the tension, reach out to a professional garage door technician for help.
11. What to Do If the Door Won’t Balance
If you have changed the cable and adjusted the tension but your garage door won’t balance, the problem may be with the torsion spring. It’s important to remember that touching the torsion spring can be very dangerous. This kind of work should only be done by experts.
A professional technician has the skills and tools to find and fix the problem safely. They will check the spring for any damage, look at the spring tension, and make needed changes or replacements to get the balance right. This will help the door work safely and well.
Always keep in mind that your safety comes first. Trying to fix a tricky issue like spring imbalance can lead to bigger problems or even injuries. It’s better to rely on a professional to make sure your garage door needs are met safely and correctly.
Maintenance Tips to Prevent Future Cable Issues
Preventing a broken garage door cable is easier than repairing one. By regularly checking your garage door system, you can avoid surprises and expensive repairs. Look for any signs of damage on the cables and other parts.
Making sure to lubricate the moving parts can also help them last longer and work smoothly. A little care and attention can keep your garage door safe and working well.
12. Regular Inspection and Lubrication
Keeping up with maintenance on your garage door is important. It can stop cable failures and make your garage door system last longer. A quick visual check every few months can help you spot any problems early.
Look at the cables for signs of fraying, kinks, or rust. Check the cable drum and pulleys for wear or damage. Focus on where the cables turn around the pulleys since these spots often wear out.
Also, remember to lubricate the moving parts of your garage door. This includes the hinges, rollers, and cable drum. Use a lubricant made for garage doors. Stay away from WD-40 or other general lubricants because they can pull in dirt and debris, which can cause issues. Regular checks and lubrication help keep things running smoothly and reduce wear on important parts.
13. When to Call a Professional for Help
This guide helps you with garage door cable repair, but sometimes you may need a pro. If you feel unsure about working with springs or face more complicated problems than just replacing the cable, ask for expert help.
If you see major damage to the torsion springs, like cracks or breaks, contact a garage door repair technician right away. Working with damaged springs is very risky and can cause serious injuries.
Professional garage door technicians have the skills, experience, and the right tools to fix various problems safely. They can find the issue accurately and offer trustworthy solutions. This way, your garage door roller will work smoothly and safely for many years.
Remember, when you are not sure, it is best to play it safe and get a professional garage door repair service. They can set up a service appointment when it works for you or give emergency garage door repair if required. This gives you peace of mind and ensures the job is done right.
Conclusion
It is very important to take care of your garage door cable repair. This helps your garage door work smoothly and safely. By doing the steps in this guide and checking on your cables regularly, you can stop problems before they start. This will help your garage door system last longer. Always think about safety.
Use the right tools, and get professional help if you need it. Looking after your garage door cables will save you time and money. It will also give you peace of mind, knowing your garage door is working correctly. If you face any problems during the repair process, reach out to a pro for help.
Frequently Asked Questions
1. Can I repair a garage door cable myself?
Yes, you can repair garage door cables by yourself if you have the right tools and knowledge. It’s very important to follow safety precautions. But if you feel unsure or uneasy about it, it’s better to hire a professional.
2. How often should garage door cables be replaced?
Garage door cables do not have a fixed time for replacement. It’s important to check them regularly to see when they need to be replaced. You should think about replacing them if you see a lot of damage or if the cables are close to the end of how long they last.
3. What are the risks of DIY garage door cable repair?
DIY garage door cable repair can be risky. You could get hurt from spring tension or falling doors. If you don’t feel comfortable doing it or don’t have the right skills, it’s a good idea to get help from a professional.
4. Can frayed cables be repaired, or should they be replaced?
It is better to replace frayed garage door cables instead of trying to repair them. Trying to fix them can put safety at risk and shorten their life. Replacing them will make sure that your garage door works well and stays reliable.
5. What’s the cost of professional garage door cable repair?
The cost of fixing a garage door cable varies depending on where you are and which professional service you choose. Usually, it falls between $100 to $250. While doing it yourself might look less expensive, getting help from a pro gives you good value and peace of mind.
6. How much does it cost to fix a broken cable on a garage door?
Fixing a broken garage door cable usually costs between $100 and $250. The price can change based on what repairs are needed. Getting a professional to look at it gives you the best cost estimate and helps save money.
7. Can garage door cables be replaced?
Yes, you can replace garage door cables. You can do this yourself or hire a professional to help. Replacing the cables makes the door work again and ensures it operates reliably.
8. What type of cable is used for garage doors?
Garage doors usually use strong aircraft-grade cables. These cables are known for their tough strength. They are very durable and work well. They can handle the heavy work of opening and closing garage doors.
9. What to do when garage door cable breaks?
If your garage door cable breaks, first unplug the opener from its power source. This is an important safety step. Do not try to open or close the door. Instead, contact a professional repair service for quick and safe repairs.