Regular garage door maintenance is important for both convenience and safety at home. Garage door roller replacement are key parts that help the door move smoothly. However, over time, these rollers can wear out. When that happens, you might notice noise, bumps, and even safety issues.
This easy-to-follow guide will give you the knowledge and steps you need to garage door roller replacement with confidence. With years of experience, this guide helps you understand how to bring back your garage door’s performance.
Key Takeaways
- Worn-out garage door rollers can cause frustrating noises and hinder smooth operation.
- Replacing your rollers is a manageable DIY project that can save you money on professional service calls. This guide provides a step-by-step walkthrough to guide you.
- Before you begin, gather the necessary tools like a ladder, socket wrench, pliers, and safety glasses.
- Always disconnect the power to your entire garage door opener before starting any repairs to prevent electrical hazards.
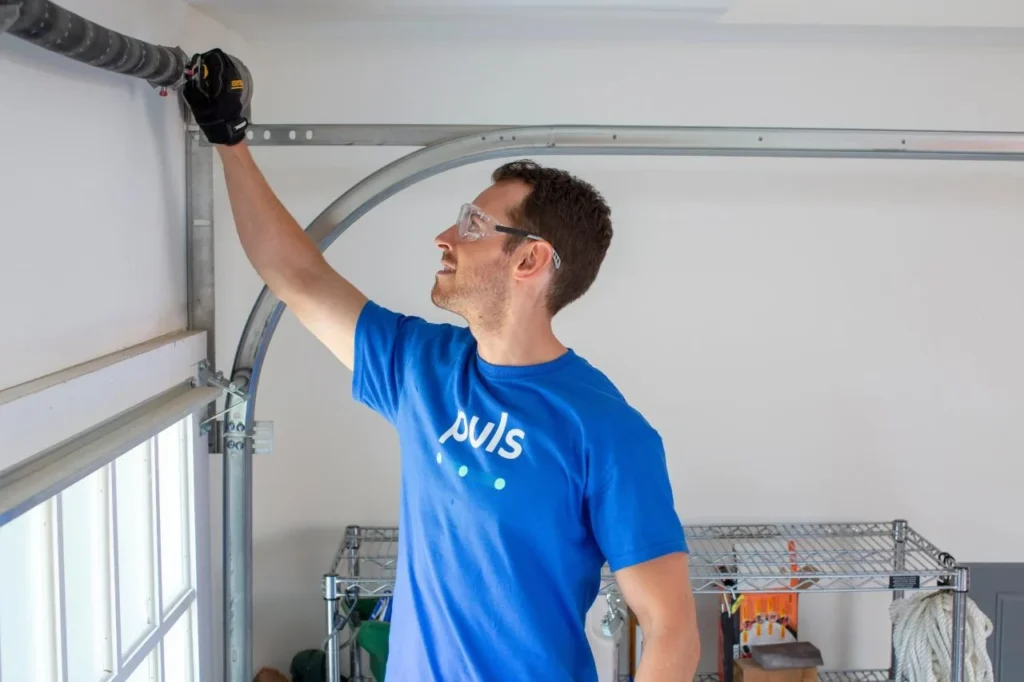
- If you encounter difficulties or have concerns about safety, don’t hesitate to seek assistance from a qualified garage door professional.
Understanding Garage Door Rollers and Their Importance
Garage door roller replacement is very important for the smooth running of your garage door. They support the weight of the door as it goes up and down the tracks, making sure it moves easily. These small parts are usually made of steel, nylon, or plastic, and each type has its own advantages.
It’s really important to replace garage door roller replacement on time. Old rollers can be very noisy, making it hard to open or close your garage door quietly. They can also put extra pressure on the garage door opener and other parts. This can lead to expensive repairs later.
1. What Are Garage Door Rollers?
Garage door roller replacement are vital for your garage door operation system as they help it open and close smoothly. These small wheels attach to the sides of the door and move along the tracks, supporting its weight. Rollers can be made from steel, nylon, or plastic rollers. Steel rollers are durable but noisy, while nylon rollers are quieter and longer-lasting. Choose based on your priorities: noise reduction with nylon or longevity with steel rollers.
2. Why Is Timely Replacement Crucial?
Garage door roller replacement on time is crucial to prevent wear and tear. Friction can wear out the bearing inside the rollers, leading to noise. Exposure to weather can cause rust, weakening the rollers. Prompt replacement can avoid sudden issues and prolong your garage door’s lifespan. Addressing roller issues early prevents bigger problems later.
When to Replace Garage Door Rollers?
Recognizing the signs of worn-out rollers is important for keeping your garage door service life in good shape. If you hear loud noises, like grinding or squeaking, it means you need roller replacement service. If the door shakes or vibrates when you open or close it, that also shows the rollers are worn out.
Do not ignore these signs. If you see damage to the rollers, like cracks or chips, replace them right away. This can help you avoid accidents. By fixing these problems quickly, you can prevent more damage to your garage door tracks. This also makes sure it works smoothly and safely.
Preparing for Garage Door Roller Replacement
Before you start replacing the rollers, you need to prepare well for a smooth experience. First, gather the tools and materials you will need. These should include a sturdy ladder, a socket wrench, pliers, and replacement rollers that match your garage door model.
It’s also important to create a safe working area. Make sure to disconnect the power to the garage door opener. This step will help prevent any accidental opening while you work. Then, pull the emergency release cord to disconnect the opener from the door. This action lets you operate the door manually during the roller replacement.
3. Tools and Materials Needed
The garage door roller replacement yourself can be a great way to save money and feel good about completing a home project. With the right tools and materials ready, you can make the process easy and successful.
Before you begin, gather these important items:
- Replacement garage door rollers: Pick rollers that match your garage door model and track size.
- Socket wrench set: This handy tool will help you loosen and tighten bolts.
- Pliers: These are great for gripping and taking out cotter pins.
- Ladder: You’ll need one to safely reach the upper rollers.
- Work gloves: These will shield your hands from dirt, grime, and injuries.
Even though the cost of materials for garage door roller replacement is fairly low, doing it yourself can save you a lot compared to paying someone else. With a bit of time and effort, you can do the job well and keep your garage door opener remote battery system working smoothly.
4. Safety Measures Before Starting
Before starting any garage door repair, prioritize safety. Unplug the opener to prevent unexpected movement. Wear protective gloves and eye gear to avoid injuries from sharp edges and debris. If unsure or if things get complicated, seek help from a professional technician for a safe and correct repair. Regular maintenance can extend the lifespan of your garage door nice and ensure its safe operation over time.
The Benefits of Replacing Garage Door Rollers
Your garage door roller replacement when they start to wear out has many benefits. You will feel a smoother and quieter movement when you sliding garage door along the tracks. There will be no more loud sounds from old rollers. This better performance also helps your garage door opener work easier, which might make it last longer.
Also, new rollers can make your home safer. Old rollers can get stuck, which puts pressure on the entire system and raises the chance of failures. This can leave your garage door function, unprotected or even cause it to stop working correctly, putting your home at risk. By getting new rollers, you can keep your garage door functionality working well and secure, giving you peace of mind.
Step-by-Step Guide to Replacing Garage Door Rollers
Garage door roller replacement might look tough, but you can easily do it yourself if you follow some simple steps. First, make sure to unplug your garage door opener. Check your owner’s manual for any specific instructions for your model before you start.
If you follow these steps closely and keep safety in mind, you can replace your garage door rollers. This will help your garage door replacement part work well and safely again. Take your time, check your work twice, and ask for professional help if you need it.
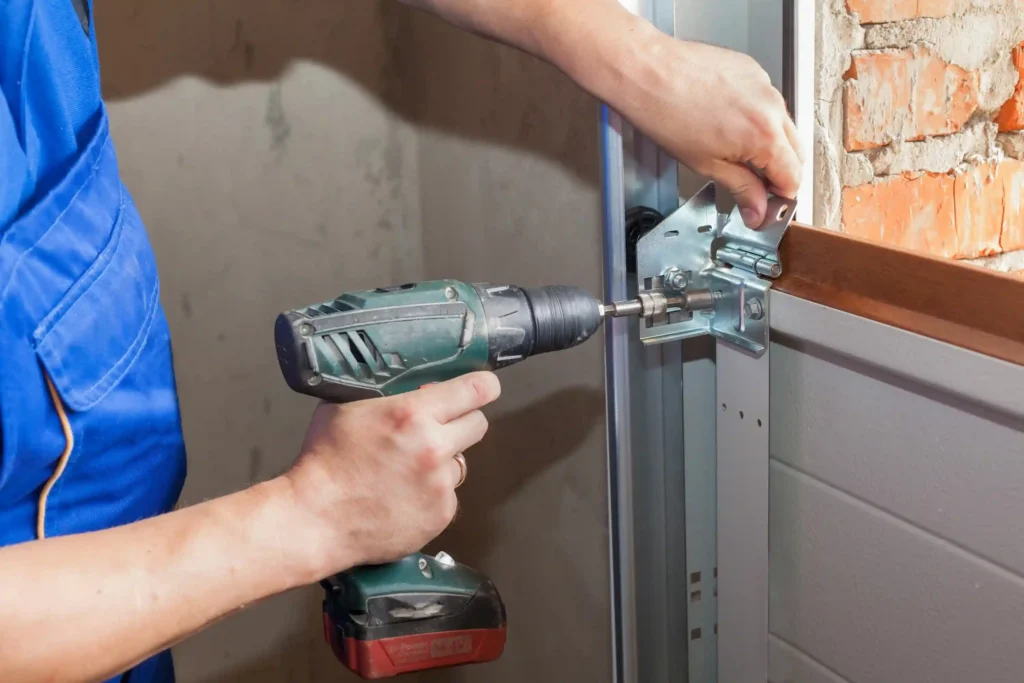
5. Step 1: Securing the Door and Preparing the Area
Before you start replacing the rollers, first unplug the garage door opener from the power source. This is a key safety step to stop any accidental operation of the door while you work. Find the emergency release cord, which is usually a red cord hanging from the opener, and pull it to disconnect the opener from the door.
Next, hold the garage door roller tracks closed with clamps or vices so it doesn’t move as you work. Be very careful when handling garage door springs. This is especially true for torsion springs because they have high tension and can cause serious harm if not handled correctly.
If you have a torsion spring system and do not feel safe working with it, it’s better to call a qualified garage door expert to help. When the door is safely secured and the opener is unplugged, you can go on to the next step of removing the old rollers.
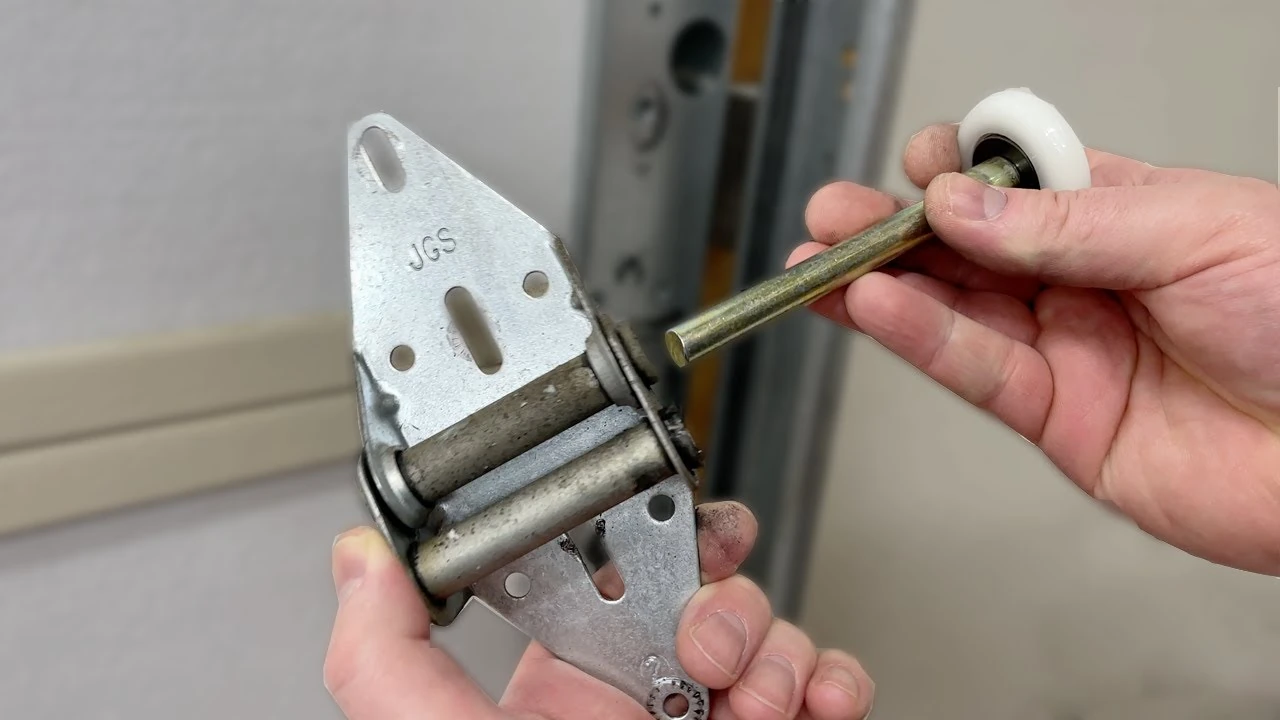
6. Step 2: Removing the Old Rollers
To start changing your garage door rollers, first check the current rollers and brackets. Use pliers to fix any bent tabs or pins that hold the roller in place. It’s important to be careful and to work slowly. This helps to avoid any damage or injury.
You can use a socket wrench or screwdriver, based on your model, to loosen the bolts that keep each roller bracket attached to the garage door. Once the bolts are loose, gently slide the old roller out from the track. It’s a good idea to replace one roller at a time. This keeps the door balanced and prevents it from falling off.
As you take out the old rollers, check the brackets too. If you see any wear, cracks, or damage, it’s smart to change them along with the rollers. This will help work well and avoid expensive garage door repair costs. Make sure to keep any removed hardware, like bolts and pins, to use when putting in the new rollers.
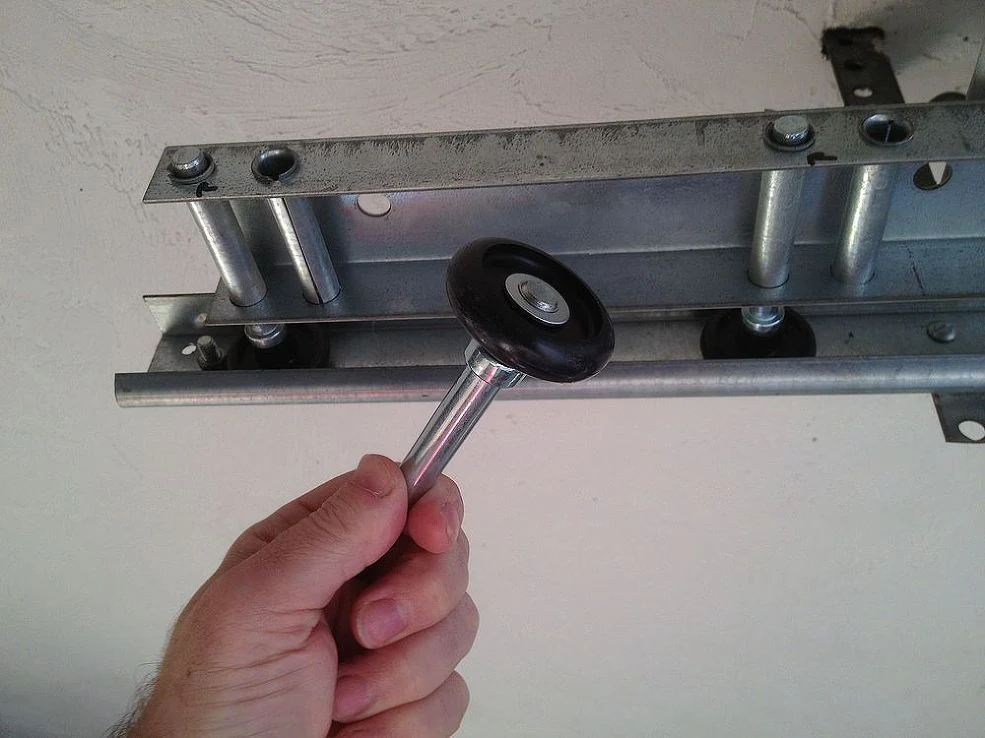
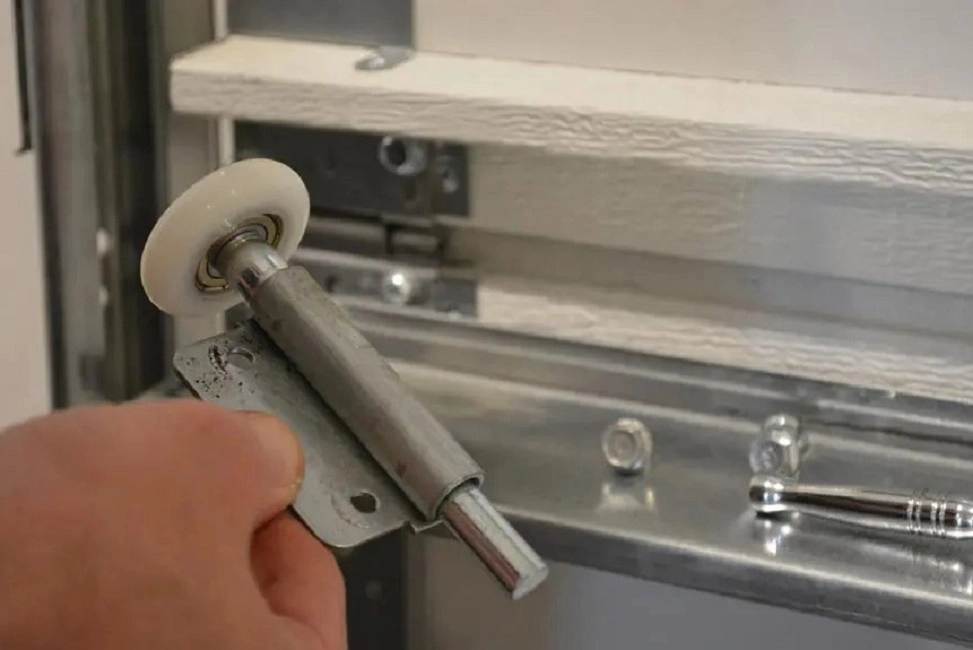
7. Step 3: Installing the New Rollers
With the old rollers taken out, place the new rollers with the track and slide them in. Make sure the rollers fit well in the track guides. Depending on whether you have nylon rollers or steel rollers, check that the bearings are oiled for a smooth ride.
If your new rollers have a dual cage ball bearing system, make sure it’s in the right position inside the roller housing. This design helps it last longer and roll better. Tighten the bolts well but do not over-tighten them, as that could break the brackets or rollers.
After replacing all the rollers, check that the brackets are in line and tight. This helps distribute weight evenly and stops any pressure on the door or the opener.
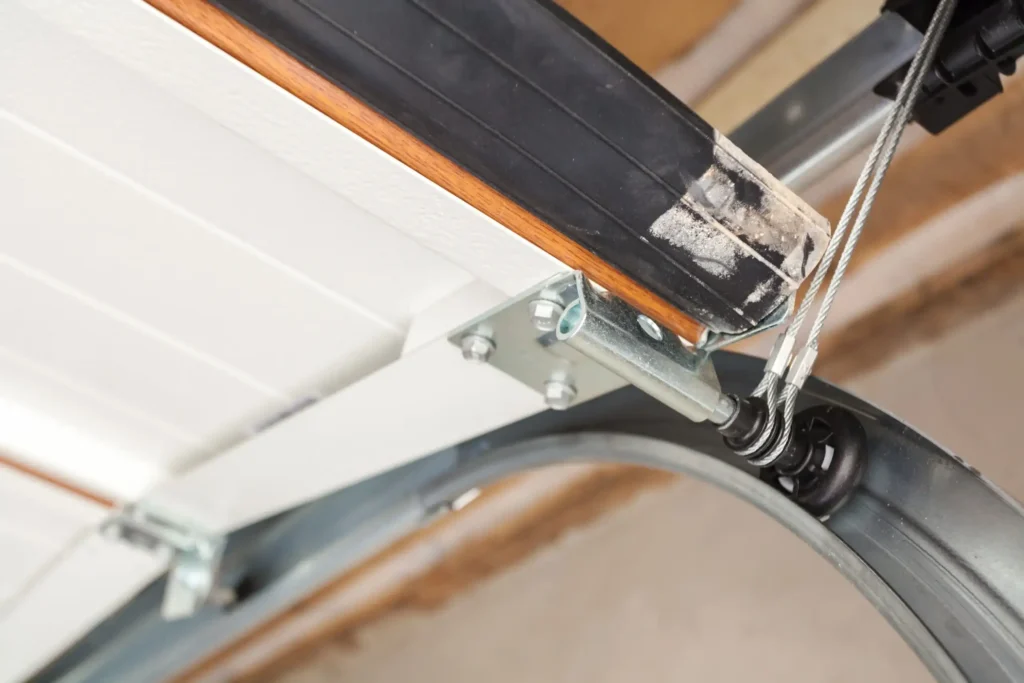
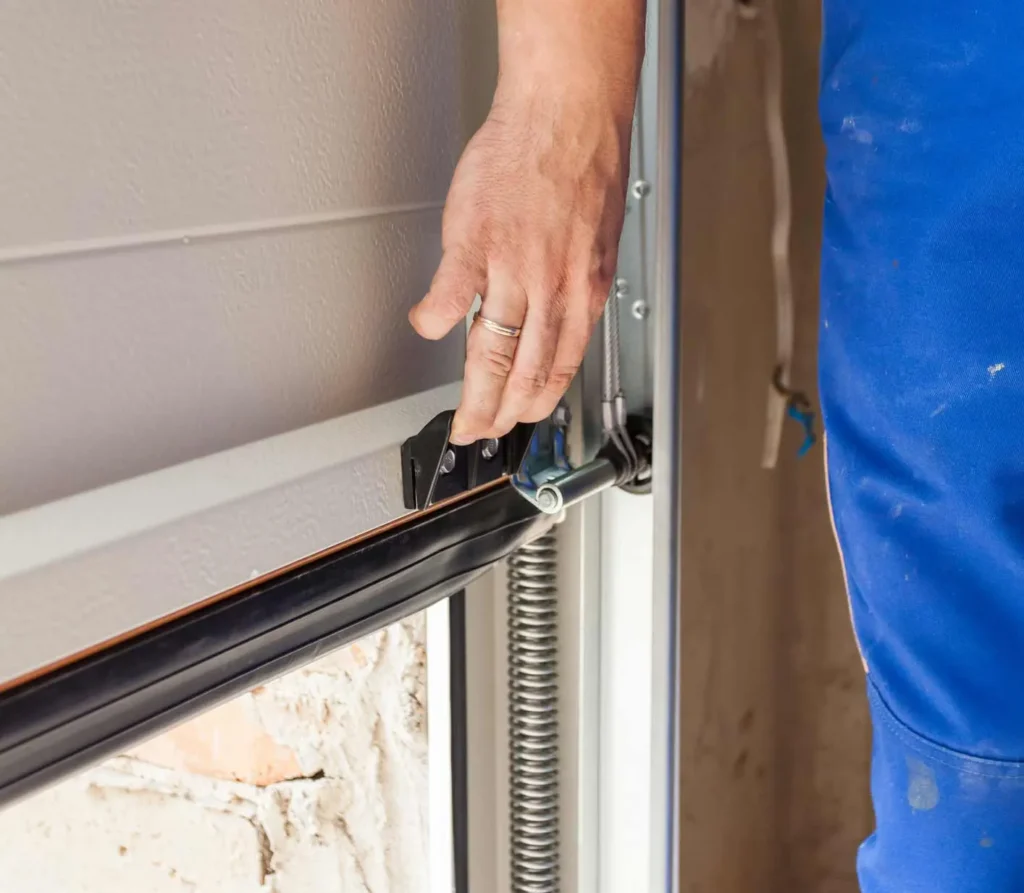
8. Step 4: Reattaching the Brackets and Cables
After you install the new rollers, focus on putting back the brackets and cables. If you found any broken or worn brackets while taking them off, it’s time to replace them with new ones. Line up the brackets with the roller stems and use the bolts you took off earlier to secure them.
If your garage door sizes has extension springs, check that they are connected and adjusted correctly for the right tension. These springs are important because they balance your garage door weight and help it move smoothly. If you’re not sure how to adjust the springs, look at your garage door’s manual or ask an expert for help.
Once the brackets and cables are back in place and the springs are adjusted properly, your garage door cable is nearly ready to use. Do a final check to make sure all bolts are tight, the rollers are in the tracks, and every part is in the right spot.
Troubleshooting Common Issues During Roller Replacement
Encountering problems during a garage door roller replacement is common, even for people who do DIY projects often. One challenge is dealing with old rollers that are hard to move. Another problem may come up when you try to align the tracks after adding the new rollers.
This section will help you get through these usual issues, offering easy tips and solutions. With some patience and the right methods, you can handle these problems and finish your roller replacement project successfully.
9. Dealing with Stubborn Old Rollers
When dealing with the removal of old rollers, it’s essential to approach the task methodically. Start by using a penetrating lubricant on any stubborn areas to ease the process before exerting force. In cases where the roller shows signs of wear and tear, delicately tapping around the edges of the bracket with a hammer and chisel can help loosen it. Remember that patience is crucial during this process to avoid causing any unnecessary damage. If you encounter persistent issues with stuck rollers, it may be wise to enlist the expertise of a professional to prevent further complications.
10. Adjusting Misaligned Tracks
Misaligned tracks are a common problem when changing garage door rollers. This usually happens with small shifts or bumps during removal and installation. To fix this issue, start by looking closely at the whole track system. Focus on sections that seem out of line.
Gently tap the misaligned track sections back into place. You can use a rubber mallet or a piece of wood to protect the track. If the misalignment is larger, you might need to loosen the track brackets a little. Then, adjust the track’s position and tighten the brackets again.
It’s important to keep the tracks straight and aligned. This helps your garage door operate smoothly and safely. No matter if you have standard garage door company or heavy-duty commercial doors, check your tracks regularly. This will help avoid extra wear and tear on your rollers and opener.
How soon should I replace my garage door rollers?
Knowing when to garage door roller replacement is important for keeping your garage door system working well and safe. The lifespan of your rollers can depend on use and the environment, but there are clear signs to look for.
If your garage door frame makes loud noises while opening or closing, like grinding or squeaking, it may be time to change the rollers. You should also look for shaky or jerky movement when it works, or see visible damage on the rollers. Don’t wait until the rollers completely break; noticing these signs early can help prevent bigger issues later.
Can I replace my rollers myself instead of hiring a professional?
Garage door roller replacement is a DIY project that many homeowners can do easily with the right help and some patience. It does involve heavy parts and some tension, but following simple steps makes it easier. If you don’t feel safe using tools or handling risky parts, it’s best to hire a professional for your garage door installations.
One big reason to try DIY roller replacement is to save money. When you hire a professional for garage door roller replacement, you pay for both labor and materials. Doing it yourself means you can skip the labor costs. You can find many helpful guides and videos online, and high-quality rollers are easy to buy. This way, you can feel confident about doing the project and be happy with your work.
Cost of Replacing Garage Door Rollers
The cost of garage door roller replacement can vary depending on several factors, including the type of rollers, the number of rollers needing replacement, and whether you hire a professional or opt for the DIY route. Typically, homeowners can expect to pay between $50 to $200 for materials when undertaking this project themselves.
Hiring a professional for the job will naturally increase the overall cost, often falling within the $100 to $300 range. While DIY offers potential savings, it’s essential to weigh the complexity of the task against your comfort level and skills.
| Factor | Estimated Cost |
| DIY Materials | $50 – $200 |
| Professional Installation | $100 – $300 |
Conclusion
It is important to understand why timely garage door roller replacement matters. This helps your garage door solid work well and last longer. By using the step-by-step guide and knowing common problems, you can keep your garage door system in good shape. Regular maintenance and replacing parts when needed can help you avoid expensive repairs later.
If you have questions or face issues during this process, it’s a good idea to get professional help for safety and efficiency. The performance of your garage door relies on how well its parts are working. So, pay attention to the importance of having functioning rollers.
Frequently Asked Questions
1. Can I replace garage door rollers without calling a professional?
Yes, you can often replace garage door rollers on your own. But, if you feel unsure about it or don’t have much experience with garage door repair, it’s best to get help from a qualified “garage door roller replacement near me.” This will keep you safe and ensure it is installed correctly. Regular care and quick fixes can help your garage door work well for years.
2. How often should garage door rollers be replaced?
Garage door rollers typically last 5 to 7 years with proper maintenance. However, their lifespan may vary based on usage frequency and surrounding conditions. If you observe noise, jerky movements, or damage, consult a garage door expert to assess if roller replacement is necessary.
3. Are there different types of garage door rollers?
Yes, garage door rollers are made from different materials, such as steel, nylon, and plastic. You can also find various types of bearings, like ball bearing and z bearing rollers. Each type gives different levels of noise reduction, durability, and smooth operation.
4. What are the signs that my garage door rollers need replacement?
Loud grinding or squeaking sounds from your garage door indicate worn-out rollers. Look for a shaky door, visible wear or corrosion on the rollers, and increased friction during operation. Regularly checking your garage door system can help you identify these issues early.
5. Can lubrication extend the life of my garage door rollers?
Using lubricant on your garage door rollers can extend their lifespan, especially for steel ones. Applying a silicone-based lubricant reduces friction and prevents corrosion on the bearings and roller sleeves, ensuring smooth and quiet operation. Keep in mind that while lubrication is crucial for maintenance, it won’t repair worn-out rollers in the long term.
6. Is it worth replacing garage door rollers?
Replacing garage door rollers is worth it as they enhance smooth operation, reduce noise, and prevent further damage. Timely replacement can extend the lifespan of your garage door system and avoid costly repairs. Regular maintenance ensures optimal performance and safety.
7. How much are new rollers for garage door?
New rollers for a garage door typically cost between $10 to $30 per roller. The total cost will depend on the number of rollers needed for your specific door. It’s important to invest in quality rollers to ensure smooth and efficient operation.
8. Are garage door rollers a standard size?
Garage door rollers come in varying sizes to fit different types of doors. It’s crucial to choose the correct size for smooth operation. Refer to your door’s manual or consult a professional for the appropriate size.