
A broken garage door can be very annoying. Luckily, many LiftMaster garage door opener troubleshooting can be fixed easily. This guide gives helpful tips and solutions for homeowners who have issues with their LiftMaster garage door openers.
It explains how to understand your opener, find common problems, and do simple repairs yourself. If the issue does not go away, it is a good idea to check the Liftmaster garage door opener troubleshooting manual or get help from a professional.
Key Takeaways
- A LiftMaster garage door opener Troubleshooting can often be done with a few simple fixes.
- Always start by checking for basic issues like power supply, remote batteries, and obstructions.
- Safety sensors are crucial for preventing accidents, so ensure they’re properly aligned.
- If simple fixes don’t work, consult your owner’s manual or contact a professional technician.
- Regular maintenance of your garage door opener can prevent future issues.
Understanding Your LiftMaster Garage Door Opener Troubleshooting
Before you start troubleshooting your LiftMaster garage door opener, it’s good to know its basic parts and how they work. Take a look at your owner’s manual for details about your specific model and safety tips.
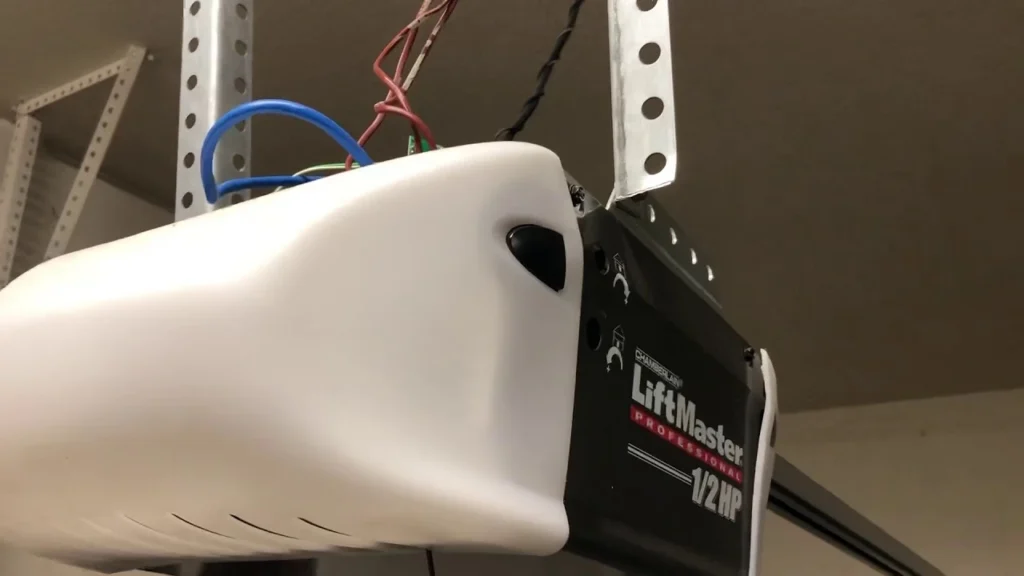
LiftMaster openers usually have a motor unit, a trolley, a rail system, safety sensors, and a control panel. The motor unit moves the trolley along the rail to raise or lower the garage door rust. Safety sensors are placed close to the ground on both sides of the door.
They stop the door from closing if something is in the way. The control panel is usually on the wall inside your garage and can be integrated with myQ technology, allowing you to operate the door and change settings remotely through an app.
1. Identifying Common Opener Models and Their Features
LiftMaster offers various garage door opener models, each with unique features and technologies. Understanding your model’s capabilities can assist in troubleshooting and compatibility with new parts or accessories.
Popular LiftMaster opener models include chain drive, belt drive, and wall-mount openers. Chain drive openers are affordable and dependable. Belt drive models operate quietly, ideal for garages near living spaces. Wall-mount openers are ceiling-free for added safety features.
2. The Importance of Regular Maintenance
Regular maintenance is crucial for the machine’s longevity and performance. Clean tracks, oil moving parts, check for damage, and ensure safety sensors are clear and properly aligned. This simple upkeep can prevent major issues and costly repairs.
Troubleshooting Guide for Common Issues
Let’s look at some LiftMaster garage door opener troubleshooting and how to solve them. Always keep safety first. Be sure to unplug the power before you start any work or repairs.
The next sections will give you easy steps to follow for fixing these issues. If the problem doesn’t go away after trying these solutions, it’s best to call a skilled garage door technician.
3. Fix #1: Resetting Your LiftMaster Opener
Sometimes, a simple reset can fix small problems with your LiftMaster opener.
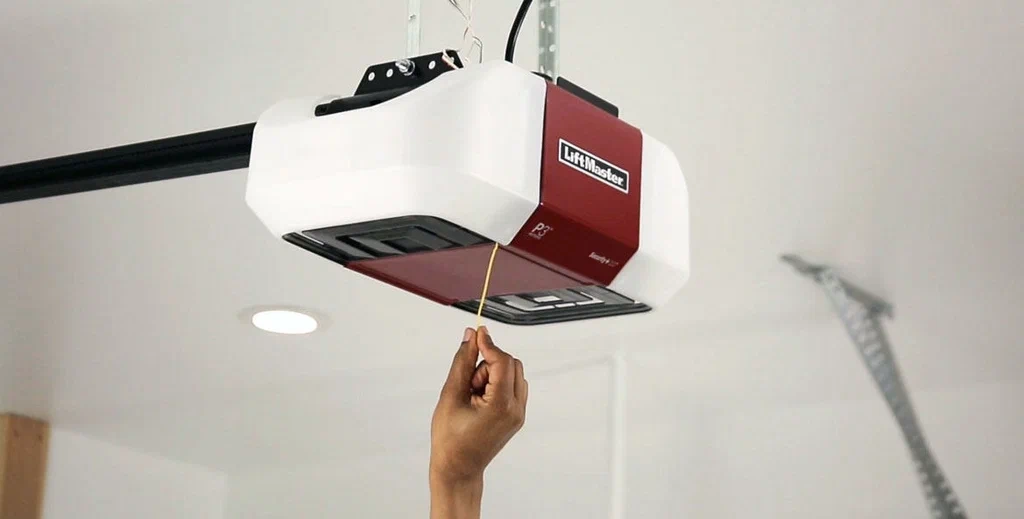
First, find the “Learn” button on the motor unit. It is usually a yellow or red button. Press and hold the “Learn” button for about six seconds, or until the light on the motor unit blinks. This will delete all old programming, including remote controls and keypads.
After resetting, you will need to reprogram your remote controls and keypads. Check your owner’s manual for instructions specific to your model about programming.
4. Fix #2: Aligning the Safety Sensors
Safety sensors prevent accidents by detecting obstacles and ensuring the door doesn’t close on them. If your door is not closing properly or the opener lights are blinking, check the sensors.
Locate the sensors near the ground on both sides of the door and ensure nothing obstructs their view. Use a level to align them correctly. Adjust sensor positions if needed by loosening screws. Test by closing the door with an object in its path; it should retract upon detecting the obstacle.
Advanced Fixes for Persistent Problems
If simple fixes, like resetting the opener or aligning the safety sensors, don’t solve the problem, you should think about more advanced troubleshooting steps. These might need some special skills or tools.
Be careful and always keep safety in mind when doing these repairs. If you feel unsure about any of these steps, it’s a good idea to reach out to a certified LiftMaster technician for peace of mind and help.
5. Fix #3: Replacing Worn Gears or Sprockets
Worn gears or sprockets can make grinding noises. They can also stop the door from opening or closing smoothly.
First, disconnect the power supply. Then, disengage the trolley so you can reach the gears and sprockets. Look closely at the gears and sprockets for signs of wear, damaged teeth, or loose fittings. If you see any damaged parts, you should replace them with parts from LiftMaster or other authorized stores.
When you put in new gears, remember to grease them well with lithium-based grease. This will help them work smoothly and last longer. After you have replaced the parts, re-engage the trolley, reconnect the power supply, and check how the door works.
6. Fix #4: Repairing or Replacing Faulty Wiring
Damaged wiring can lead to garage door opener troubleshooting, causing it not to respond or work intermittently, and posing safety hazards. For safety reasons, consult a qualified electrician or LiftMaster technician for assistance with garage door opener repair.
If you are confident in your electrical skills, start by turning off the power to the opener and inspecting the wiring for any damage like fraying or cuts. Repair loose connections with electrical tape or wire connectors. Replace damaged wiring with new wiring of the same gauge and rating if needed.
When to Seek Professional Help?

While LiftMaster garage door opener troubleshooting can be fixed on your own, it’s important to know when to call for help. Some problems should be handled by qualified technicians to prevent more damage or safety risks.
If you have tried all the troubleshooting steps in your owner’s manual and the issue continues, it’s best to reach out to a professional. This is especially true if the problem includes electrical parts, complex mechanical issues, or if you’re not sure what the problem is. Getting professional help is the safest choice.
7. Recognizing Issues Beyond DIY Repair
There are several signs that mean you might need a professional repair. If you smell something burning from the opener, see the door moving oddly, or find that the motor runs all the time without moving the door, these could show serious issues with the motor, wiring, or other parts inside. Trying to fix these problems by yourself could make things worse or even be dangerous.
Also, if the door is out of place, broken, or needs garage door spring replacement, it’s best to let professionals handle these jobs. They have the right skills and special tools for the work.
8. Finding a Certified LiftMaster Technician
When you need help, it is important to find a certified LiftMaster technician. This way, you can be sure of good service using original parts.
A certified technician knows how to fix and diagnose your LiftMaster opener well. They keep up with the latest technology and safety rules. You can find a certified LiftMaster dealer or technician on the LiftMaster website or by calling their customer support.
When you contact a technician, be ready to share details about your opener model, the issues you are having, and any troubleshooting steps you have already tried.
Liftmaster opener safety sensors: garage door won’t close
The safety sensors on your Liftmaster opener are very important. They help prevent accidents by stopping the door if something is blocking it. These sensors are usually a few inches above the ground on each side of the garage door opening.
They send out an invisible infrared beam across the opening, making a safety zone. If something breaks this beam, the garage door will stay open. This feature is required by law for all automatic garage doors to keep people safe from the heavy door closing by surprise.
If your Liftmaster garage door won’t close, you should first check the sensors for any blockages. Look for objects, debris, or even shadows that may be disturbing the infrared beam. Sometimes, clearing away some leaves or moving a tool can fix the problem.
Liftmaster remote control is not working
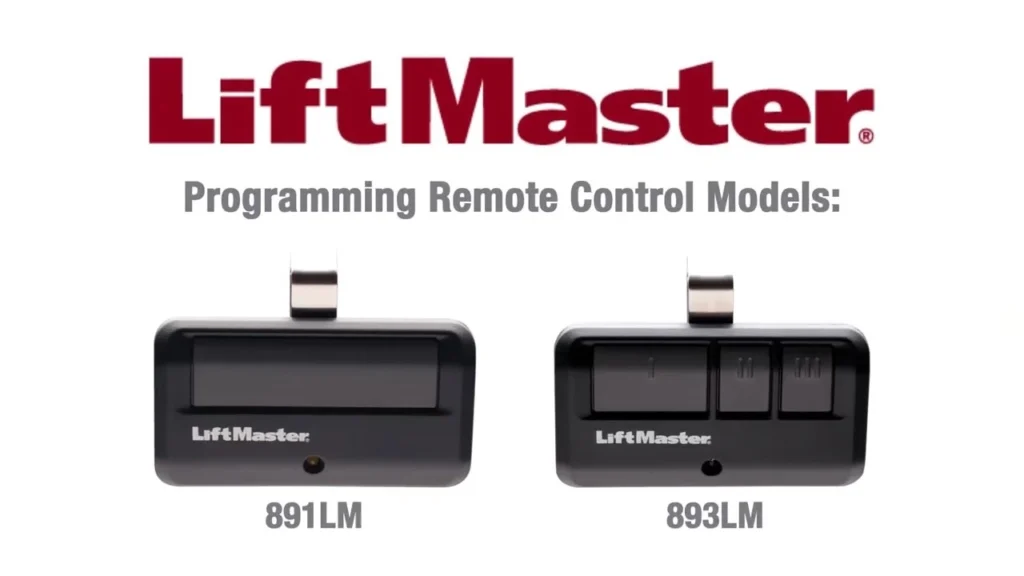
One common issue for homeowners is a malfunctioning Liftmaster remote control. Before purchasing a new one, try these simple steps: check the batteries and for potential interference. If the problem persists, reprogram the remote by following your owner’s manual instructions, typically involving locating the “Learn” button on the opener’s motor unit and pressing it to enter “programming mode.”
9. The lock switch system is activated
LiftMaster openers prioritize safety with a lock button switch system that prevents accidental garage door operation. Activating this system disables remote commands, useful for vacations or security concerns.
To deactivate, locate the switch with a lock icon on the wall control panel or near the motor unit. Ensure nothing obstructs the door’s path when turning off the system to prevent damage or injury. For further assistance, refer to your owner’s manual or contact a professional.
10. Dead batteries
If your Liftmaster remote isn’t working due to a dead battery, replacing it is a simple DIY task. To check if weak batteries are the issue, look for signs like weak signals or low battery lights. Follow these steps:
- Open the battery compartment on your Liftmaster remote by sliding off the cover or removing screws.
- Dispose of old batteries properly and insert new ones with correct orientation.
- Close the compartment securely to protect the batteries and ensure remote functionality.
- Test the remote by sending signals to your garage door opener to confirm proper functionality after battery replacement.
By following these steps, you can easily replace your Liftmaster remote batteries and restore its functionality without professional help.
11. Garage door receiver logic board
The garage door receiver logic board acts like the brain of your LiftMaster opener. It gets signals from the remote control, wall control, and safety sensors. It understands these signals and tells the motor unit to either open or close the door.
If there is a problem with the logic board, you might experience issues. This can range from the opener not working at all to it acting in strange ways. Fixing problems with the logic board can be difficult. If you think the logic board is broken, don’t try to fix it yourself. Dealing with electronic parts can be risky and unsafe.
Instead, you should talk to a qualified LiftMaster technician. They know how to find out what’s wrong. They also have the special tools needed to see if the logic board needs repair or a replacement. Trying to handle this on your own could cause more damage or even lead to electric shock.
Liftmaster close and open limits
Liftmaster openers come with settings that control how high or low the garage door goes when it opens or closes. These settings help the door stop in the right place every time. This stops it from crashing down hard or opening too high and hitting the ceiling or other things.
If the door starts to close only partway and then goes back up or hits the ground hard, it may be time to adjust these settings.
To change the limits, you need to put the opener in “programming mode.” Then, use the up and down buttons on the wall control or motor unit to set the open and closed positions.
Check your owner’s manual for instructions that match your model, as the steps can be a bit different. If the limits are not set correctly, it may cause the door to not close all the way or to go back up. This can be dangerous and may damage the door or the opener.
If you’re not sure how to adjust the limits, it’s best to consult your owner’s manual or call a professional Liftmaster technician.
Conclusion
Taking care of your LiftMaster garage door opener troubleshooting is very important for its life and proper working. Regular check-ups, fixing small issues, and knowing when to ask for help from a pro are key to keeping your garage door opener working well. With the troubleshooting guide given, you can easily fix small problems by yourself.
Look at the safety sensors, remote control trouble, and opener limits regularly, as these are common problems. If there are bigger issues or they keep coming back, it’s a good idea to get help from a LiftMaster technician. Always be quick to fix any problems to keep your garage door opener in great shape.
Frequently Asked Questions
1. How do I reset my LiftMaster garage door opener?
Most LiftMaster openers have a “Learn” button. Press it for 6 seconds until the light blinks. This resets old settings. Refer to your owner’s manual and model-specific troubleshooting guide for further repair information.
2. What does it mean if my opener’s light is blinking?
Blinking lights on a garage door opener signal safety issues. The sensors may be misaligned or there could be a wiring issue or wiring problem. Refer to the troubleshooting guide to interpret the blinking patterns and their meanings.
3. Can I replace parts of my LiftMaster opener myself?
If you need to fix small things like the garage door parts, use the manual. If it’s complicated, get a repair person for safety.
4. Why won’t my garage door close all the way?
This is a common problem with the garage door sensor. It often happens due to sensors being out of place or obstructed. Inspect the garage door sensors to ensure they are correctly positioned and clear. If the issue persists, there could be a malfunction. In such cases, it’s best to seek help from a professional. You can also consult your guide for additional assistance.
5. How often should I perform maintenance on my LiftMaster opener?
For calmness and good operation of your garage door, read the manual. Precision Garage Door, a trusted garage door company, recommends checking the opener yearly. Regular upkeep, like oiling parts, can improve performance. Consult the troubleshooting guide for additional maintenance tips.
6. Why is the LiftMaster garage door opener not working?
Many usual causes can lead to this problem. It might be a minor issue, such as a tripped circuit breaker or a drained backup power in the wall unit. Alternatively, it could involve problems with the sensor for the garage door. Refer to your guide for solving problems to identify the reason.
7. Is there a reset button on a LiftMaster garage door opener?
Yes, most garage door openers have a reset button. Press it to return the opener to default. Refer to your manual or troubleshooting guide for its location and use. Before fixing the garage door, try pressing the learn button on the motor unit.
8. What does flashing light on LiftMaster garage door opener mean?
A blinking light on your garage door opener signals an issue. Consult your manual for guidance. Different patterns indicate sensor or wiring problems. The flashing light may be faulty too.
9. How do you troubleshoot a garage door problem?
Start by using a helpful problem-solving guide. Begin with simple checks: power, remote batteries, and obstructions. Consult the opener manual for guidance and error indicators. When in doubt, seek help from a garage door expert for complex garage door problems or specific Liftmaster error codes.